 [ Update Sept. 2, 2024, to clarify that effects can be added to clips, tracks or buses.]
Hidden in the Fairlight audio page interface are several tools which can quickly optimize dialog for quality and levels in DaVinci Resolve.
One of the key benefits to mixing audio in Resolve is that, while you can add effects to clips, the real power is when you add effects to tracks or buses. A track or bus effect applies to all the clips in that track or routed through that bus. They can be set at any time without waiting until picture is locked. Since these effects are applied to the track, adding, trimming, moving, even deleting clips won’t affect the effect settings.
For me, this means that I can set this up at the beginning of an edit and have the benefit of high-quality audio even during the initial states of the rough cut without worrying that the changes I make during the edit will affect the mix.
BEST PRACTICE
There is no practical limit to the number of audio tracks Resolve supports. Because of this, it is a good practice to put men’s voices on one track, women’s voices on a second track and kid’s voices on the third track.
NOTE: You can, if you want, put each voice on its own track. For example, if one man’s voice was very loud and another’s was very soft. They need different dynamic settings, so I would put them on separate tracks.
Also, keep in mind that dialog clips are always mono files, even if the final mix will be stereo or surround. Mono audio provides the maximum flexibility in mixing.
NOTE: In general, I mix to set peaks at -4 dB, with an average level of -14 LKFS. These tend to be preferred settings for social media. Broadcast/cable requires different settings.
THE SCENE

Here’s the “scene” we’ll use for this tutorial. I labeled each track by double-clicking on the track name.
Notice that Gregg’s voice is on audio track 1, while Ellen’s voice is on audio track 2. And audio levels between the two clips are wildly divergent. Sigh… nothing new there.
THE INTERFACE

When you switch to the Fairlight page (shortcut: Shift + 7), the Mixer appears on the right side.
The mixer consists of channel strips and buses. There is one channel strip for each track in your edit. Any changes made to one track do not affect any other track. Tracks can be grouped into buses. For general purposes, you can consider Bus 1 as the “master track.” That remains true until you start creating more buses, which we won’t be doing in this tutorial.
NOTE: Resolve is absolutely optimized for two computer monitors, which displays a much larger mixer. To switch to dual monitors choose Workspace > Dual Screen > On.

If you only have one screen and the EQ section is not visible, drag the horizontal line underneath the Viewer to expand the Mixer and Track panels vertically.

Order determines the processing order of Effects (FX), EQ, and Dynamics (DY). The default FX-DY-EQ isn’t bad, but I generally prefer to process dynamic changes last.
NOTE: “Dynamics” controls audio levels.
So, click the Order letters at the top of each channel strip (top red arrow) and change it to FX-EQ-DY (bottom red arrow).
OPTIMIZING EQ
EQ, or equalization, adjusts specific frequency ranges to minimize low frequency rumbles, warm a voice make it more inviting, or improve clarity to make it easier to understand. Men’s voices are lower, women’s voice higher – generally by an octave.
While you can add EQ as an effect, it is faster, easier and better to use the “hidden” EQ section.

Click the blue line in the EQ section (red arrow) to display the Equalizer panel.

Go to the top left corner and, for a man’s voice, choose Dialog – Male.
Instantly this preset boosts some frequencies, lowers others and, in general, optimizes the voice for warmth and clarity.
NOTE: Every setting can be adjusted, but for this tutorial, we’ll use the defaults. The Resolve Help Pages explain every setting.
Next, do the same thing for Ellen’s track. Except, for reasons that I do not understand there is no Female preset. This is a startling omission.
So, go to the settings at the bottom and make the following changes:

NOTE: Take a listen and see if you like it. If so, go to the top left corner, click the Plus icon and save this as a preset: “Dialog – Female”.
While all these settings can be tweaked as you listen to each voice, these presets will shape the sound of your actors to make them sound warmer and more intelligible. Best of all, these settings apply to every clip in each track, so you can edit as much as you want, and never need to change these settings.
NOTE: I need to emphasize that there is as much craft in audio mixing as there is in video editing. I am not saying these settings are the be-all-and-end-all of audio mixing, but they are a whole lot better than doing nothing. As you learn more, you can make more sophisticated adjustments. As I learn more I will probably change my opinions, as well.
ADJUST DYNAMICS

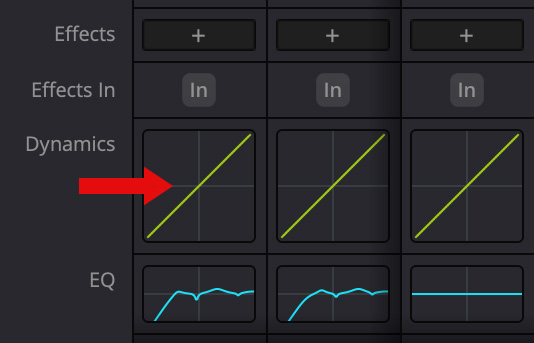
Double-click the Dynamic graphic (red arrow) in the channel strip to display the Dynamics panel.

Go to the top left corner and choose Dialog – Basic.
This enables a compressor (red light) which boosts the volume of softer speech without significantly changing the volume of louder sounds.
NOTE: If the dialog is especially loud, you can add a limiter to control the loudest portions. I explain the settings for the limiter below.

Because Gregg’s voice is very loud, I lowered the Make Up gain to 0. I try to mix dialog to around -6 dB.
Do the same thing for Ellen’s track.

Except her voice was recorded very, very soft. So boost the Make Up gain until you get a good level. In my case, I raised Ellen’s Make Up gain + 15 dB.
LIMITING THE MASTER TRACK
There’s one more audio setting I apply to every mix: a Limiter on the master bus.
The limiter is an effect that prevents audio from exceeding the level that you specify. This prevents accidental distortion created by the mix and keeps everything at a consistent level.
NOTE: You could apply a limiter to every track, but it is much more efficient to apply it to a bus because you only need to apply and adjust the setting once.

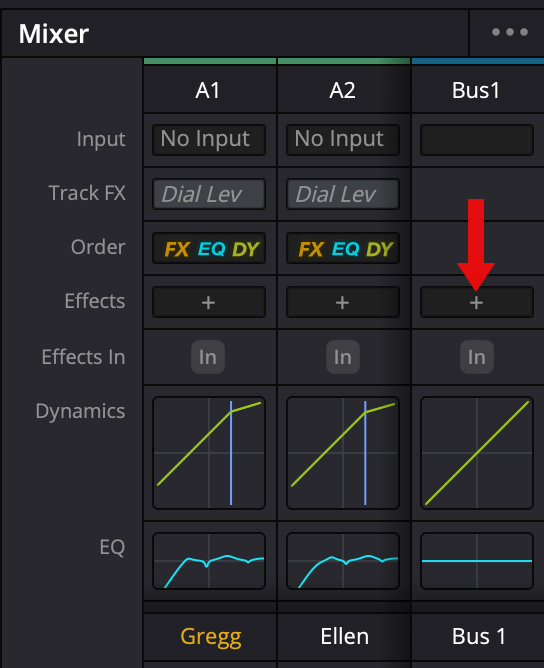
Click the Effects > Plus icon (red arrow) for Bus1.
Select Dynamics > Fairlight > Limiter.

While you can use the Limiter to boost audio levels, when I apply it to master output I simply use it to make sure levels don’t go over a certain amount. So, change these two settings:
These settings prevent, or “limit,” maximum audio levels to -4 dB, while remaining in effect for 1/2 second after dialog stops to prevent awkward “pulsing” in room tone levels.
You are welcome to use your own settings.

NOTE: The In button only needs to be enabled (on) when you have added effects from the Effect > plus menu. We did not do this for individual tracks, but did for the Limiter effect in Bus 1.
To access the Limiter settings once they are applied, click the word “Limiter” in yellow.

To reset any panel, click the Reset button in the top right corner.
SUMMARY
Every project, even every clip is different. However, by using these tools, you can harness the power of automated track effects to save time during every edit, while making your dialog clean, clear and understandable.