 A question came up at today’s webinar – Secrets of Faster Editing in Apple Final Cut Pro – on how to convert a Final Cut Pro library from one where all the media is stored inside the Library to one where all the media is stored outside the library.
During the webinar, I said that there was no easy way to do this. But… after the session, I got to thinking and decided to do some homework. The actual answer is that this can be done fairly easily.
There are two ways to move media into or out of Final Cut.
The method outlined in this article.
Or the method outlined in this other tutorial.
Transfer Media Out of a Final Cut Pro Library
Here’s how.
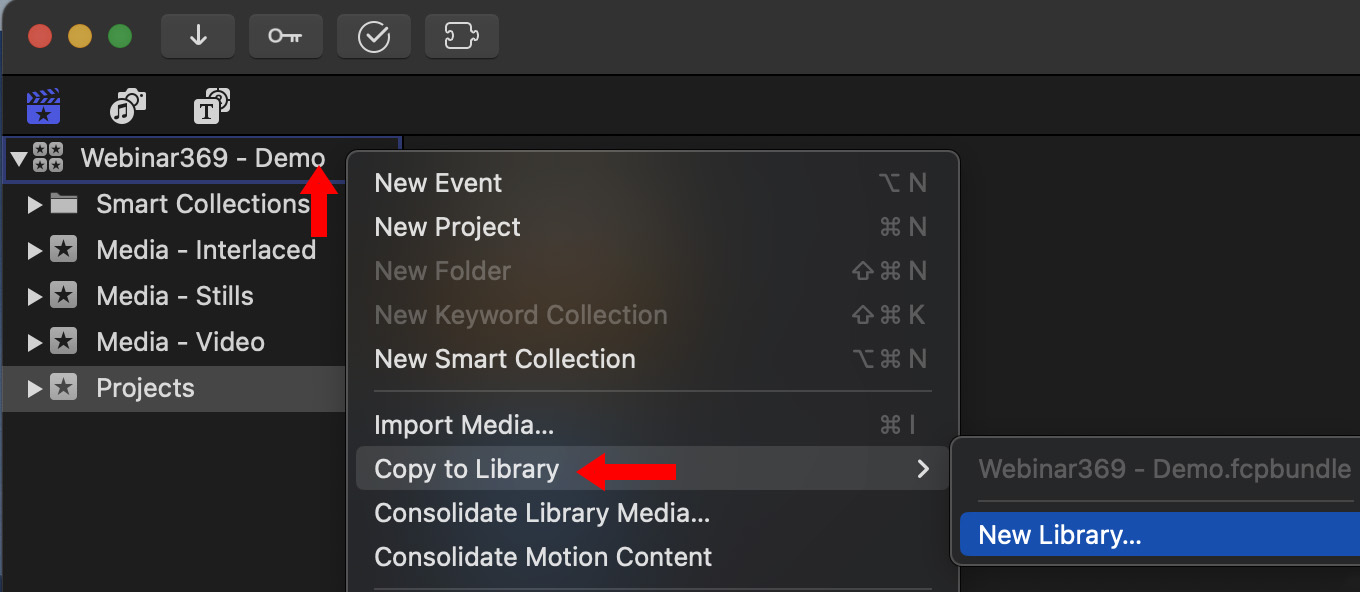
NOTE: In my example, I called it “Converted Library.” You can call it whatever you want.
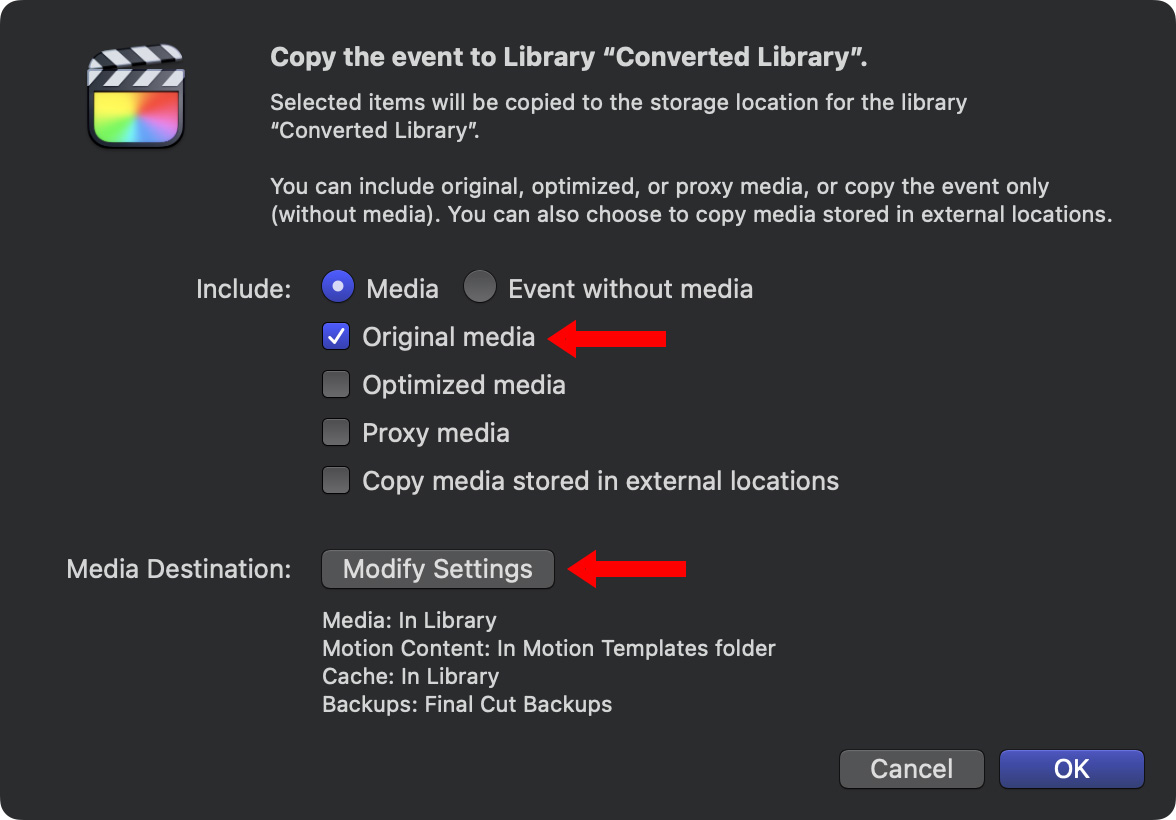
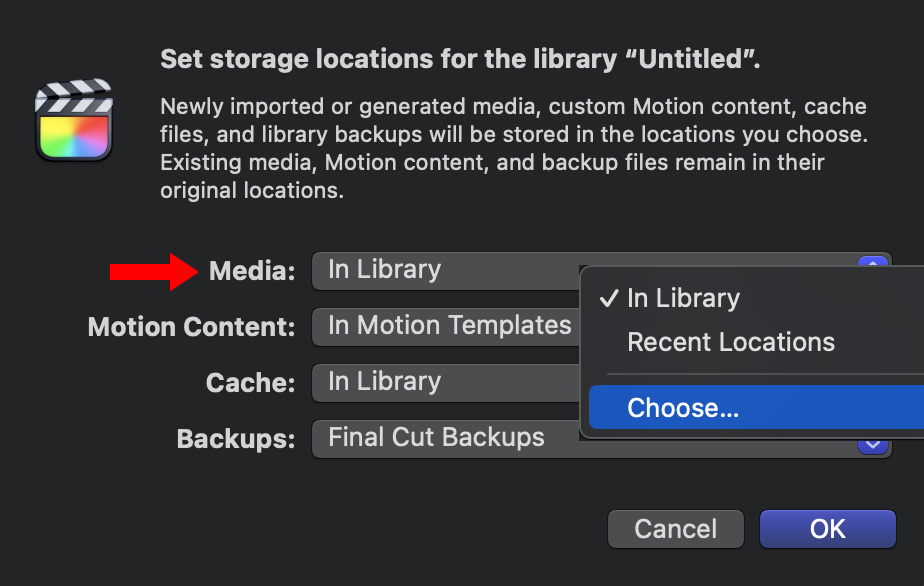
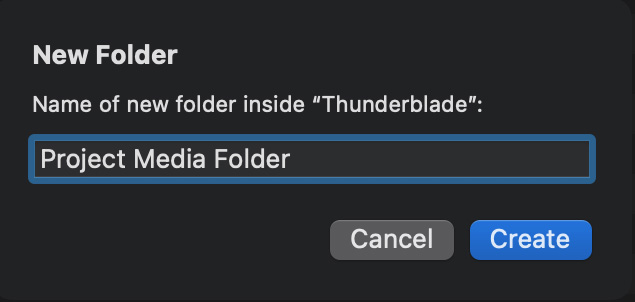
In my case, I created a folder called “Project Media Folder” on an external drive. Again, you can call this folder whatever you want.

NOTE: As I created this example, the media transferred so quickly, I couldn’t get a screen shot of the Background Tasks window in action. With today’s fast SSD storage, this process is really fast and avoids the user having to do any manual manipulation of files in the Finder.
Keep in mind that, during this process, you are temporarily doubling your storage requirements since you’re copying and not moving media. But this process protects your original work so you can check to make sure the new library is intact with everything connected.
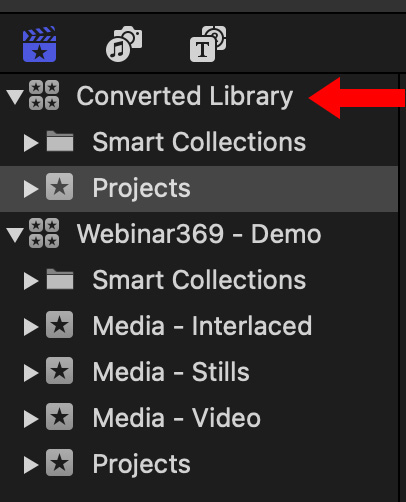
Once the process is complete, the new Library appears in the Library list. Verify that everything is OK and, once you are satisfied, you can delete the original library.
Ta-dah! MUCH easier than I expected.
EXTRA CREDIT
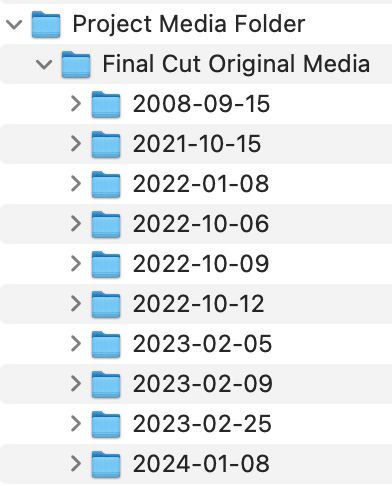
For the terminally curious, FCP stores transferred media in folders based upon the date it was shot. Since all files are linked to this structure, there’s no advantage to reorganizing these files unless you enjoy relinking.
Remember, this is a copy, so to save storage space remember to delete the original library.