 Recent updates to Apple Final Cut Pro added several more mask effects, three of which I want to share with you here:
Of these three, Image mask has the greatest potential to create interesting effects. All of these are illustrated below.
CORNER MASK
At first blush, a corner mask looks similar to the Distort effect to modify a shot. But there is a key difference: how much of the source image is retained.

The left image uses Transform > Distort. The right image uses Masks > Corner Mask. The distorted image squeezes the entire image into a new shape, providing a sense of perspective or depth. The two red arrows indicate areas in the distorted image that don’t exist in the masked image.
in other words, the corner mask simply crops edges from the image.

The right image is the inverse of the left.
NOTE: Unlike Distort, the Corner Mask can also be inverted, as illustrated here.
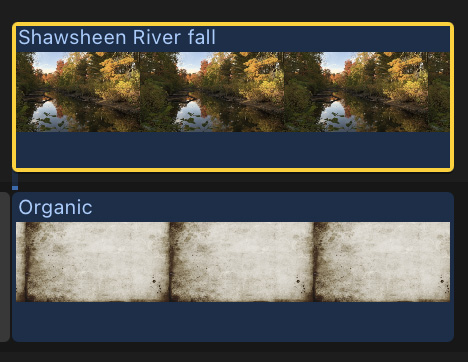
To create a corner mask (or any mask, actually) put the background image into the Primary Storyline, then the image you want to mask above it.
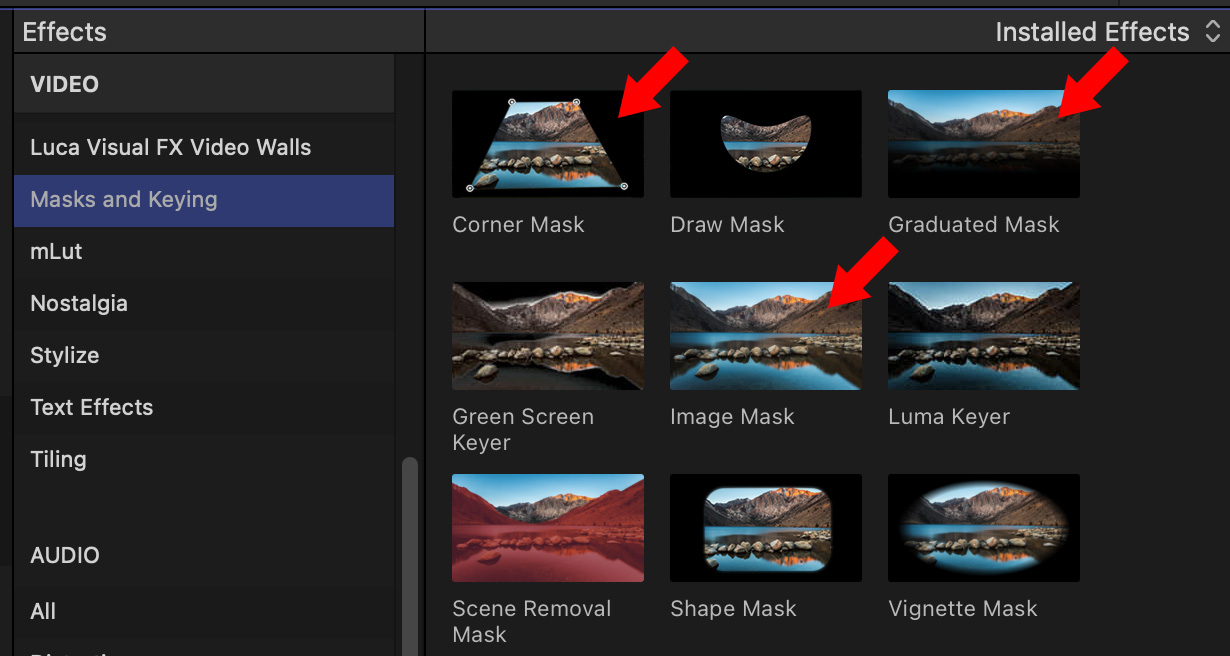
Go to Effects browser > Masks and Keying and drag Corner Mask onto the TOP clip. Masks are always applied to the top clip. (The three masks illustrated in this article are highlighted by red arrows.)
NOTE: If the top clip is already selected, you can double-click the effect in the Effects browser to apply it.
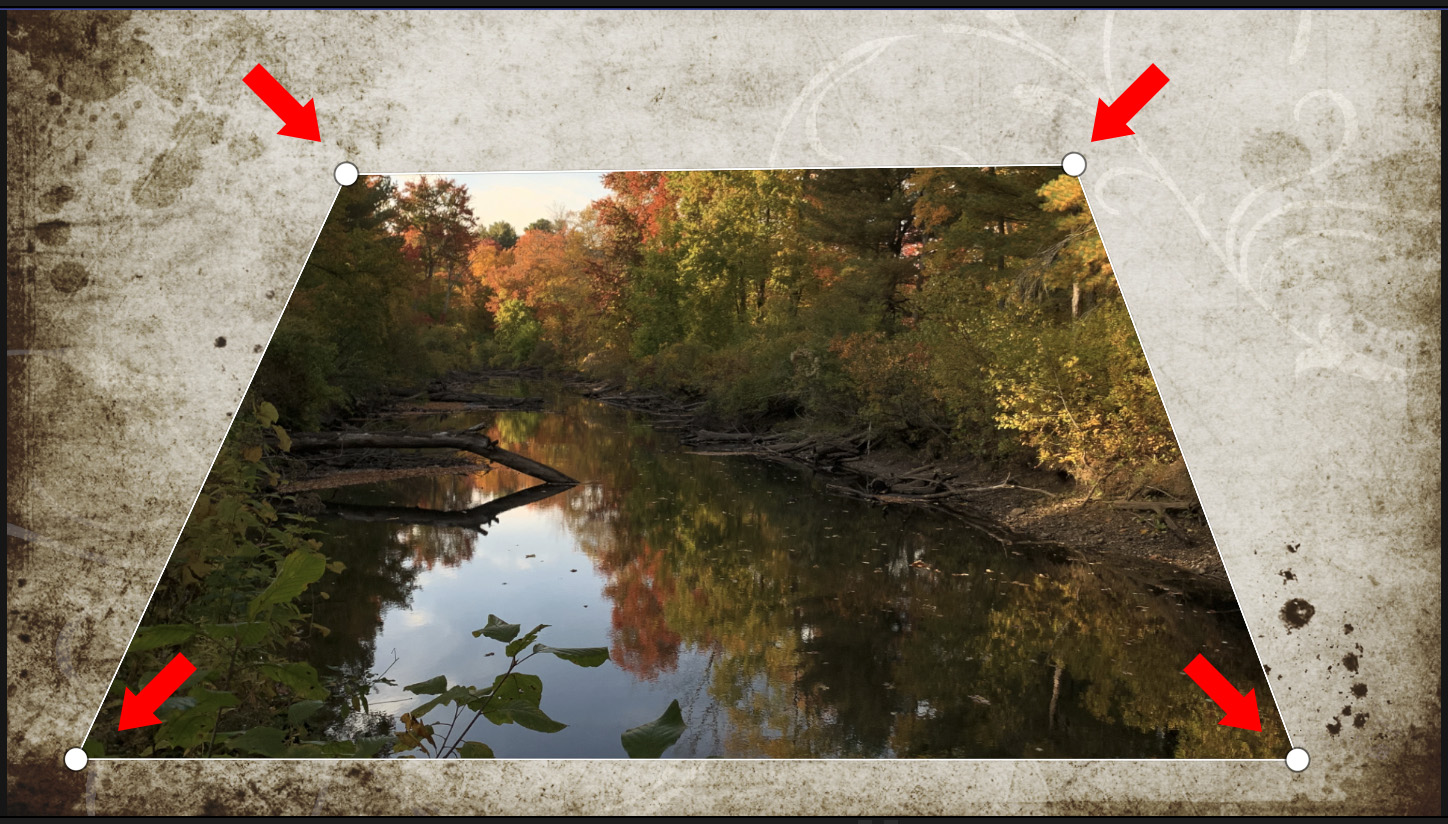
In the Viewer, drag the white dots at each corner (red arrows) to hide (mask) the edges of the image.
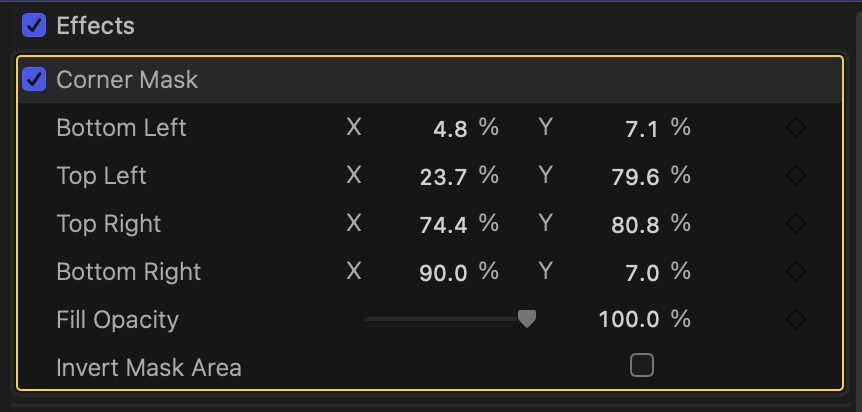
The effect itself uses percentages, not pixels, in determining coordinates. Click the Invert Mask Area to invert the selection.
NOTE: While you can adjust opacity, you can’t feather (soften) edges in this effect.
GRADUATED MASK
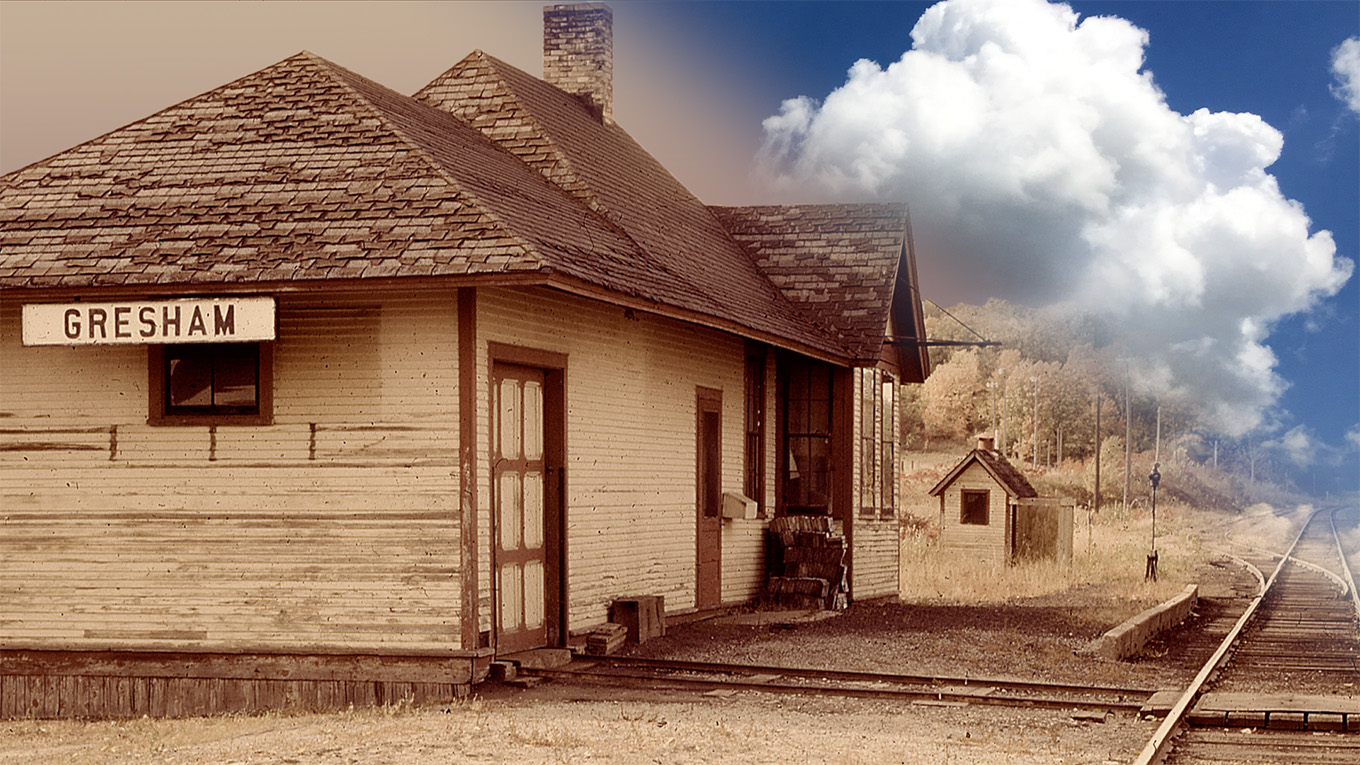
(Train station photo courtesy of Dean Jordan.)
The Graduated mask creates a soft-edge split screen between two images. In this case, the historical train station in Gresham, Wisconsin, combined with a shot of cumulus clouds taken in central Wisconsin.
To create this effect, add Effects browser > Masks and Keying > Graduated Mask to the top clip.
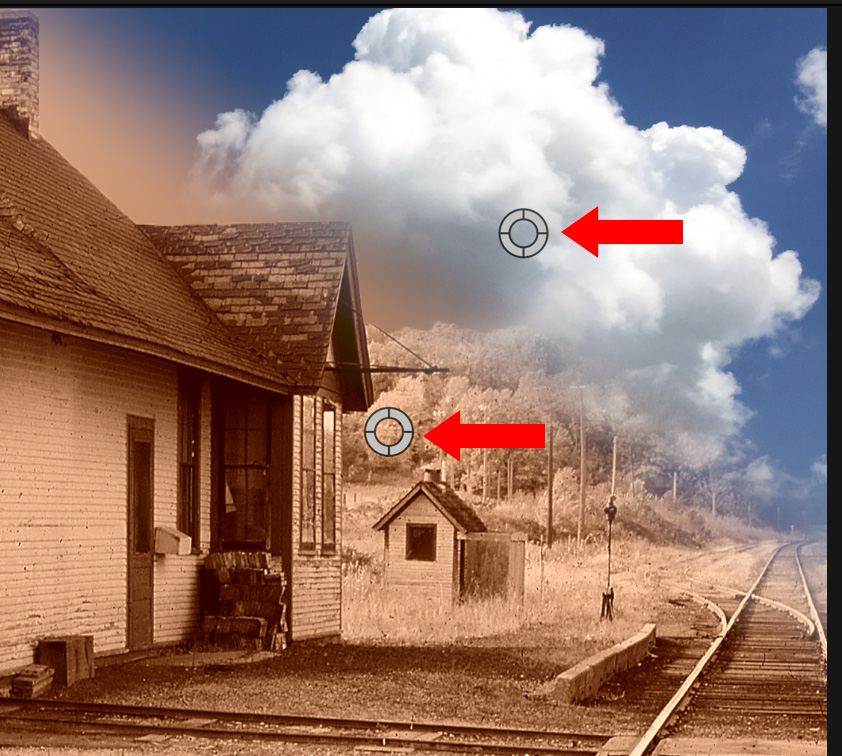
Use the white circles displayed in the Viewer to position (top red arrow) and rotate (bottom red arrow) the edge of the effect where you want it. Adjust feathering by dragging the bottom circle closer to or farther from the top circle.
NOTE: In this example, I also applied a Color > Sepia effect to the bottom (train station) clip.
IMAGE MASK
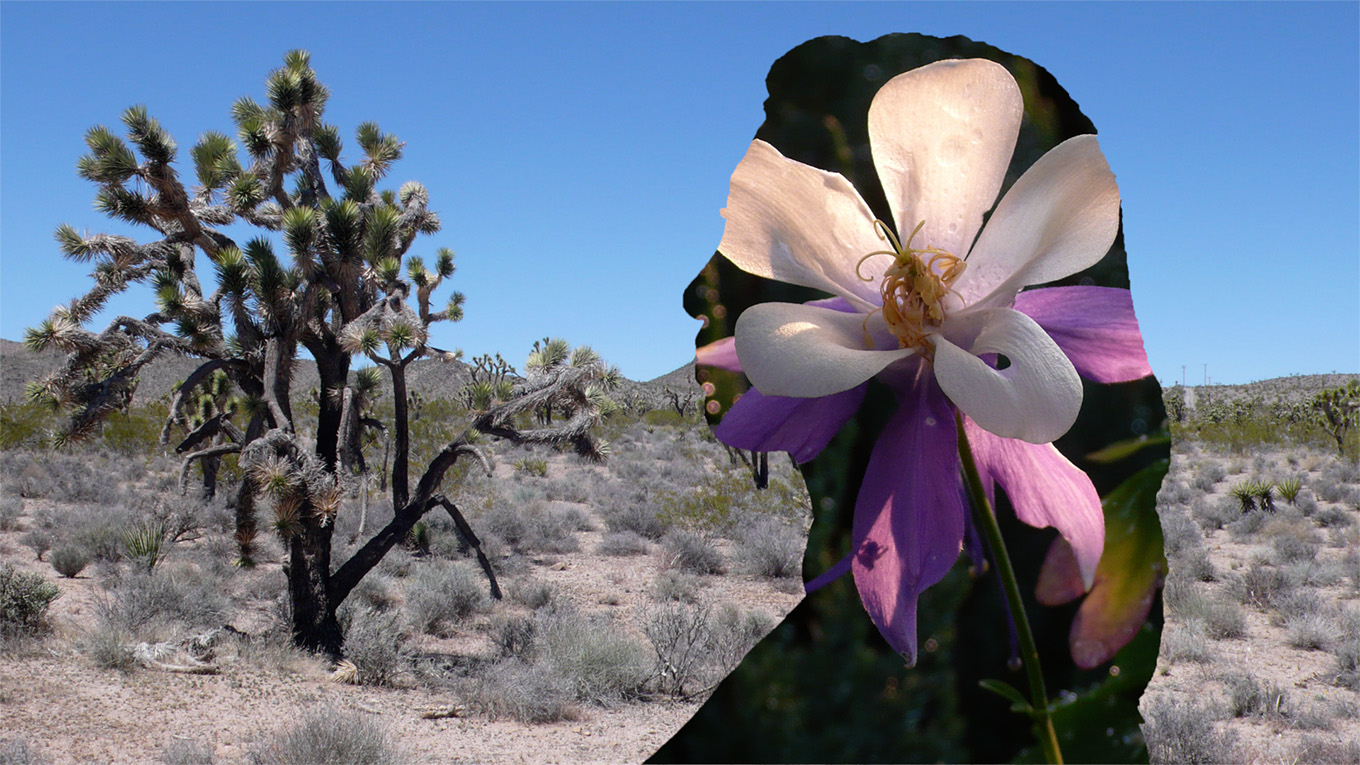 (Silhouette image courtesy A.S. Novo, Pexels.com)
In this effect, we composite one image inside another image using a third image. This provides a surprising variety of interesting effects.
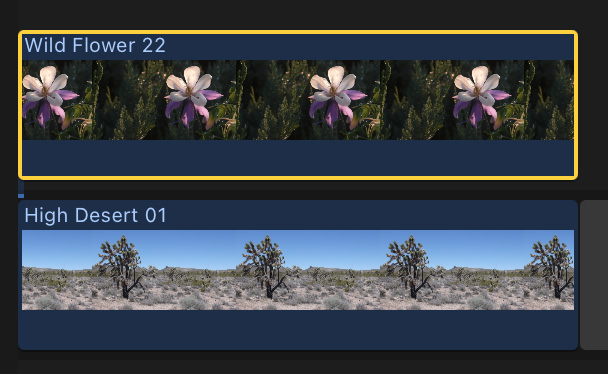
To start, as usual, put the background image into the Primary Storyline. Then, add the image to be inserted into a shape on a layer above it. Finally, import the shape image into the Browser.
NOTE: Adjusting the size or position of the top image also adjusts the size and position of the mask applied to it.
In experimenting with this effect, what seems to work best when creating a mask shape is to create a single layer Photoshop image containing a transparent area, with the rest of the image solid. Colors don’t matter because both the background and foreground areas are replaced by images from the timeline.
NOTE: Here, in Photoshop, I isolated a silhouette in black against a transparent background. This can be a still or video.
After importing the mask image into Final Cut, I selected the top timeline clip.
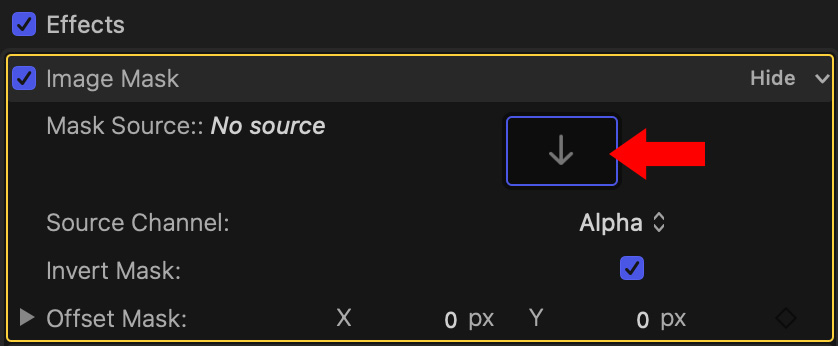
In the Video Inspector, click the Drop Zone icon in the Image mask effect to select it. Then, drag the mask image from the Browser into this drop zone icon.
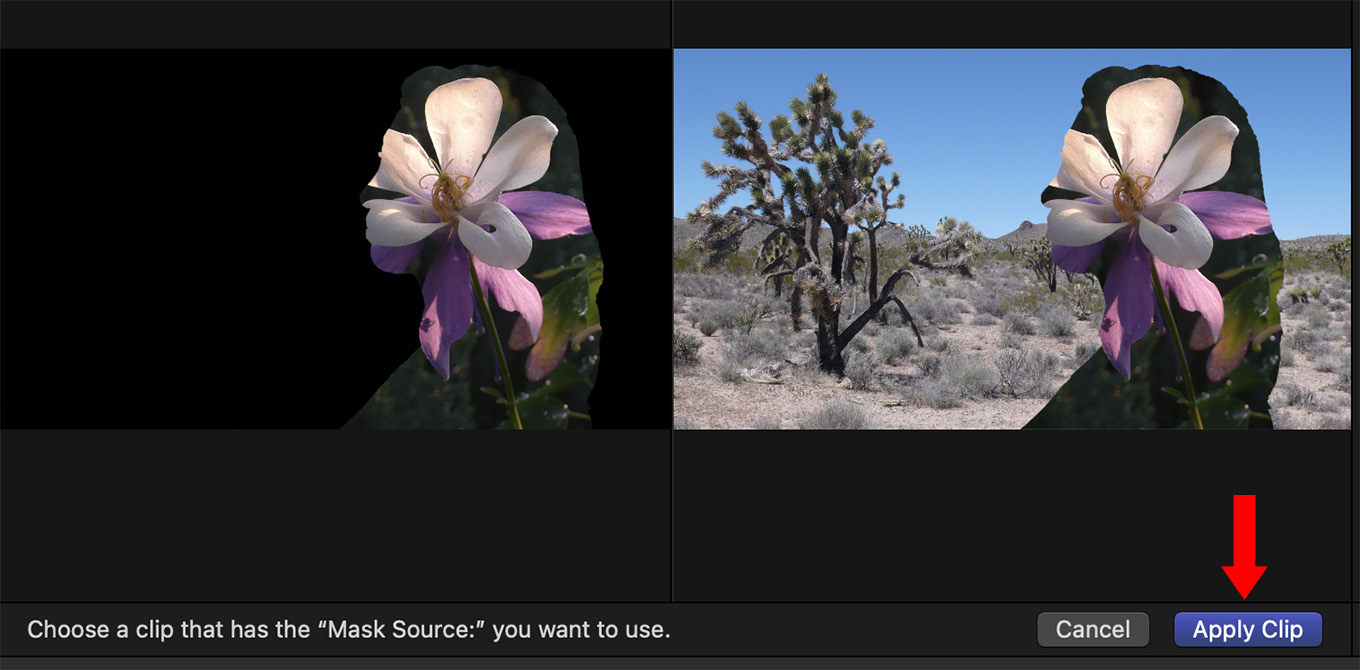
Select the top clip in the timeline, again, to activate the Apply Clip button. Then, click, Apply Clip.
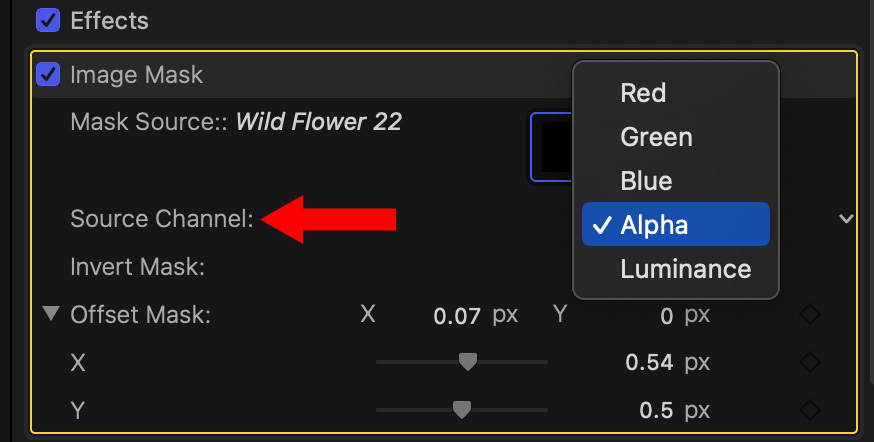
There are five masking options, called the Source Channel, which determine how to remove the background. Alpha provides the cleanest results, but, if you are working with green- or blue-screen chroma-key source footage the blue and green options are a good choice. If you have a clean silhouette, Luminance is also a good choice.
NOTE: You can’t adjust any of these Source Channel settings. For example, I found that a silhouette would not mask properly because I needed to adjust the luma settings to get a cleaner key. These adjustments can’t be made using this effect. Nor can the insert video be color graded.
In this example, I also adjusted Offset Mask to modify the position of the mask to better align it with the flower. While I can move the mask, I can’t move or resize the inserted image.
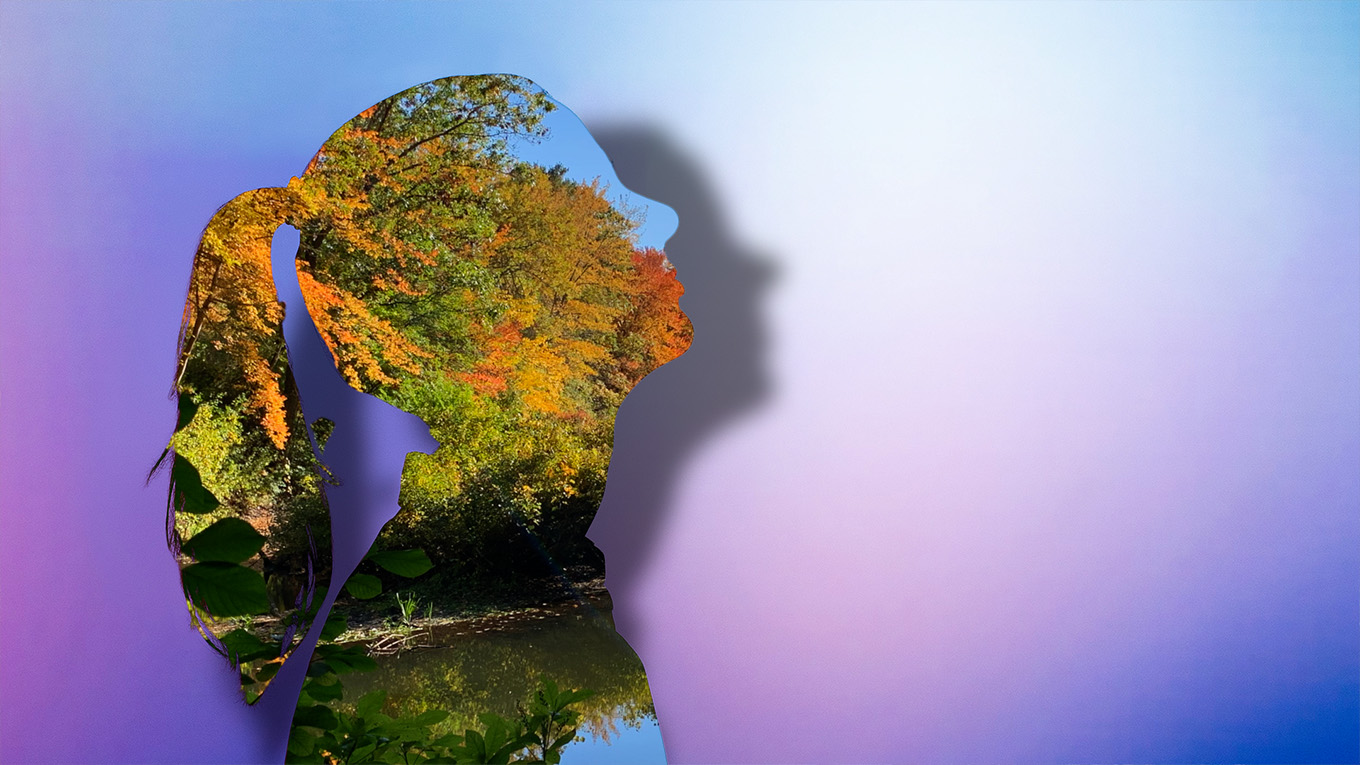 (Silhouette and background image courtesy of ThisIsEngineering, Pexels.com.)
Here’s a more visually interesting effect. This is created the same way as the earlier Image Mask:
Again, I created a transparent area (alpha channel) inside Photoshop, but this time, I left the background intact. The mask will fill the transparent area created in the image.
NOTE: I used this image for both the background clip and mask image. Since the background will be filled with the inserted image, the “hole” in this image won’t be seen.
Next, apply the Image Mask effect to the top clip. I then added the same Photoshop image I used as the background layer into the Drop Zone for the Image Mask effect and set the Source Channel to Alpha.
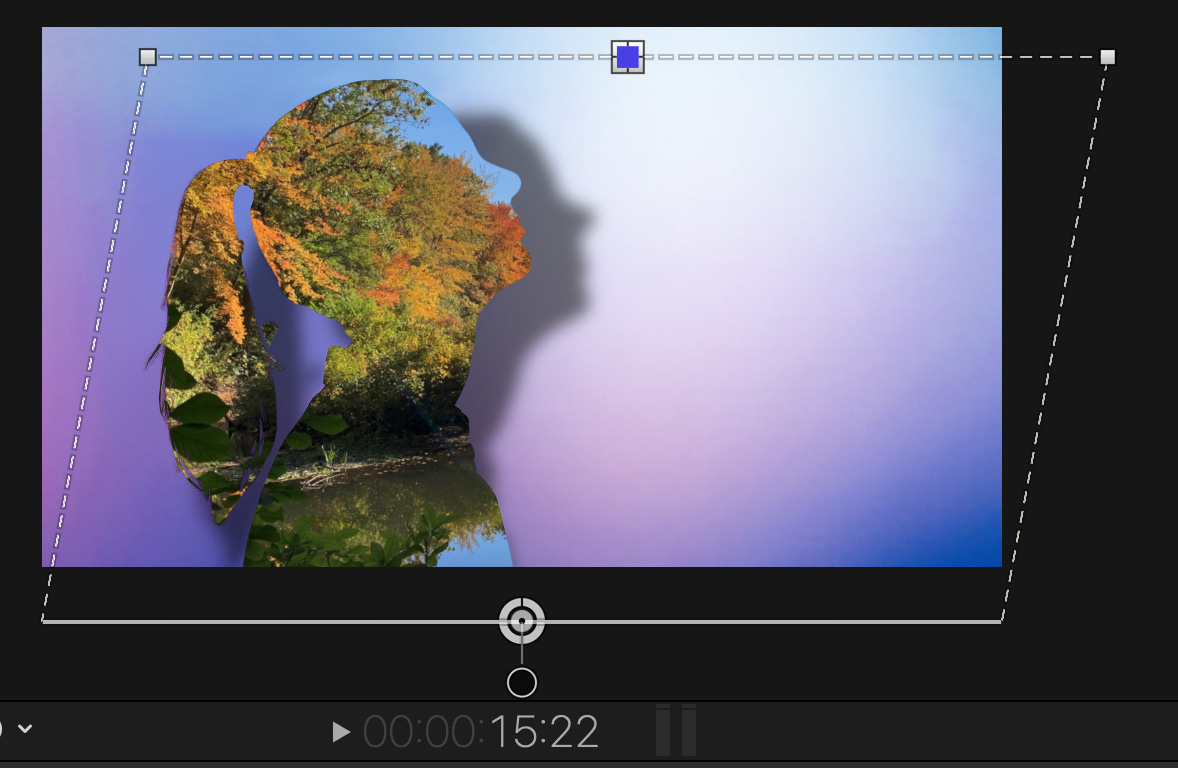
Then, I added Stylize > Drop Shadow and adjusted the on-screen position controls to change the placement of the shadow on the background.
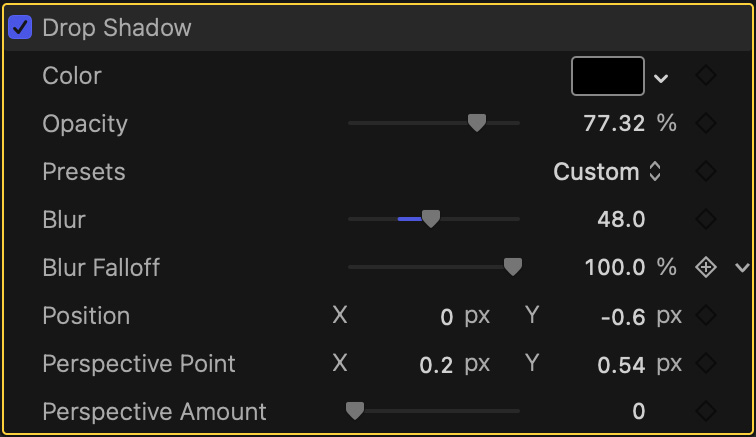
Finally, I adjusted Blur, Opacity and Perspective settings in the Drop Shadow effect itself to create the final result.
SUMMARY
Corner and graduated masks work easily with video. As do Draw, Shape and Vignette masks.
Image masks, like the two Keyers, need specially prepared video or stills. Ideally, the mask shape should contain an alpha (transparency) channel. If that isn’t possible, crushing the blacks in a clip to make a solid silhouette is the next best option.
However if you color grade changes to a clip, you’ll need to apply the color grade, export the clip, then reimport the clip as a fully rendered movie, because you can’t adjust any video used to create the mask, or inserted as a fill image.
One more note on still images. While you can save alpha channels using either PNG or TIFF files, FCP seems to work best when the image is saved as a PSD. Prepping an image isn’t hard, but takes a bit of experimentation to learn what FCP likes best.