
![]() There’s a hidden rating feature in Final Cut Pro that can help you organize your clips. It’s been there since FCP was first released over a decade ago. However, in recent years, Apple has deemphasized this to the point you may not know it was there.
There’s a hidden rating feature in Final Cut Pro that can help you organize your clips. It’s been there since FCP was first released over a decade ago. However, in recent years, Apple has deemphasized this to the point you may not know it was there.
This feature allows us to flag a clip, segment of a clip, or multiple segments of a clip as:
Then, with a single mouse click in the Browser, we can display all Favorite, or hide all Rejected, clips without actually changing any media.
Here’s how this work.
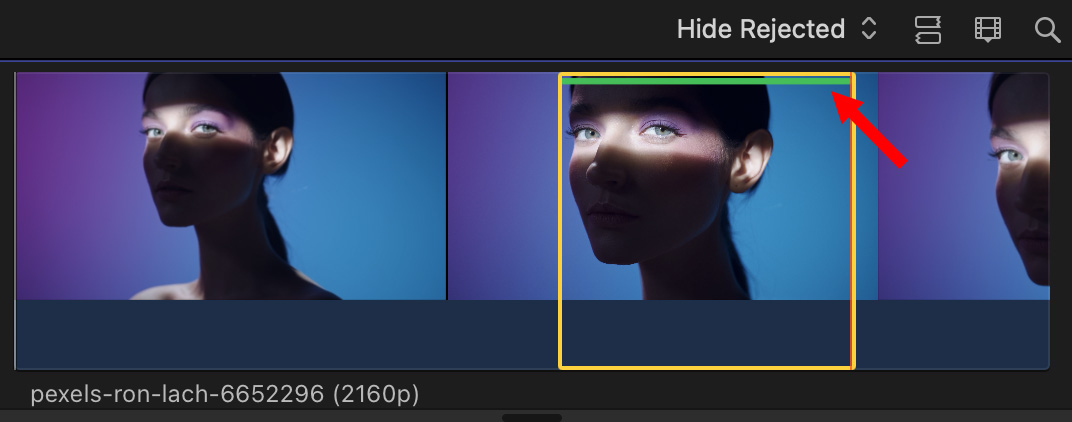
CREATE FAVORITE
Select a clip in the Browser.
Type F or choose Mark > Favorite.
A green bar appears over the entire clip indicating you’ve rated the entire clip as a Favorite.
OR …
Mark a range within a clip (by setting an In and/or an Out), then type F.
Now, the green bar just appears over the selected range.
OR …
Press and hold the Command key while selecting multiple regions in the same clip. Each region is now flagged as a Favorite.
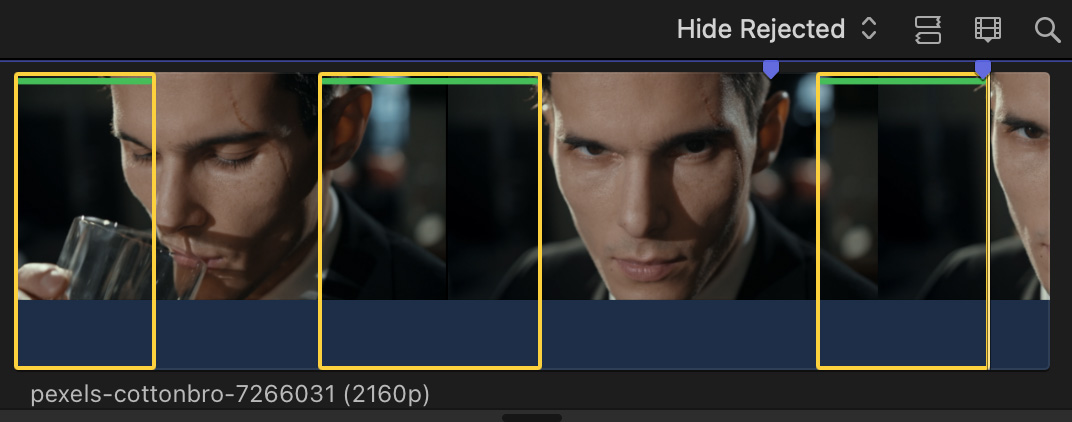
DISPLAY FAVORITES
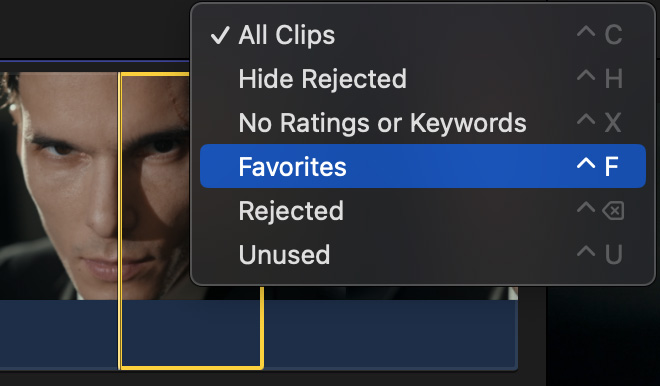
To display favorite selections, choose Favorites (shortcut: Control + F) from the menu at the top of the Browser.
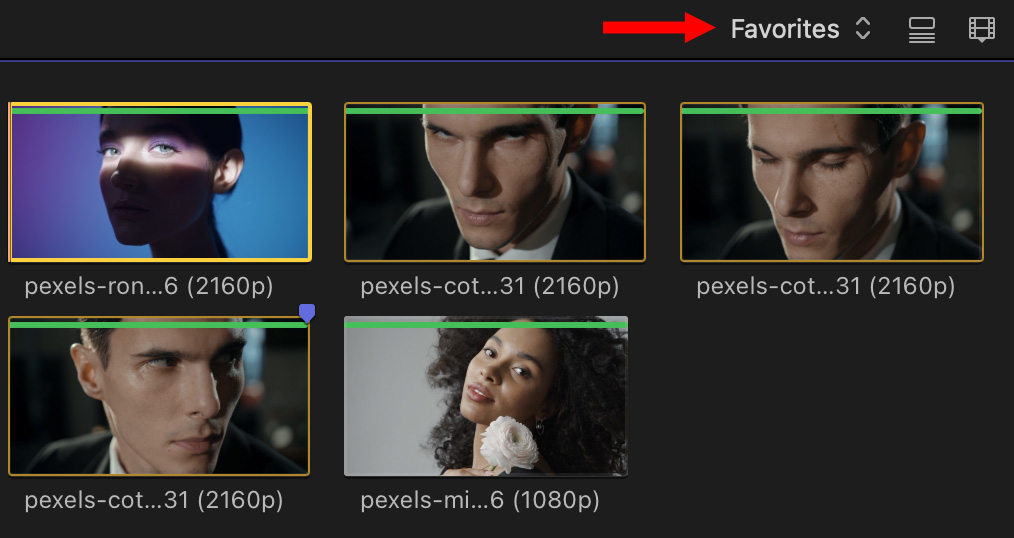
Each favorite section appears as a separate clip, even if they are contained in a single clip.
NOTE: No media was changed or deleted, this only affects the display of clips.
TO UN-FAVORITE A CLIP
Select the clip, or range, and type U (for “Unrate”), or choose Mark > Unrate. The green Favorite bar is removed and the segment no longer appears when Favorites are displayed in the Browser.
But wait! There’s more!!
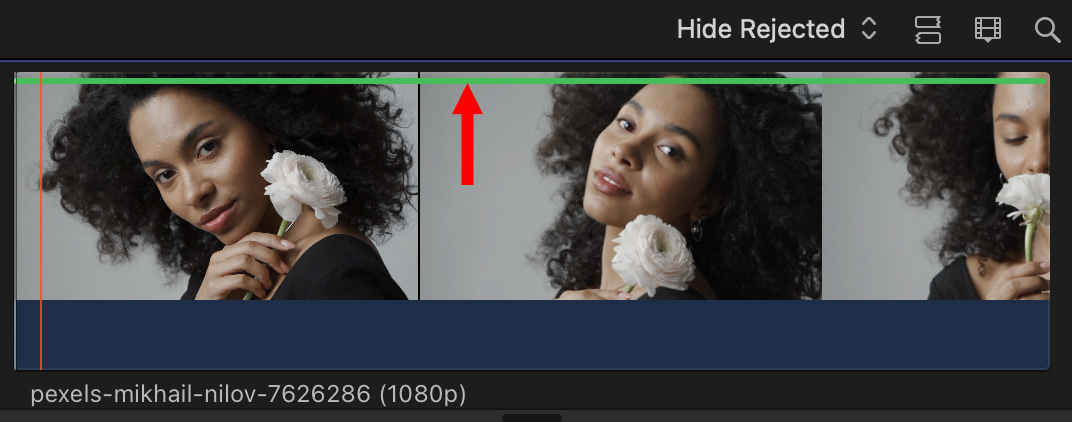
Not only can we “favorite” a clip, we can also “reject” it.
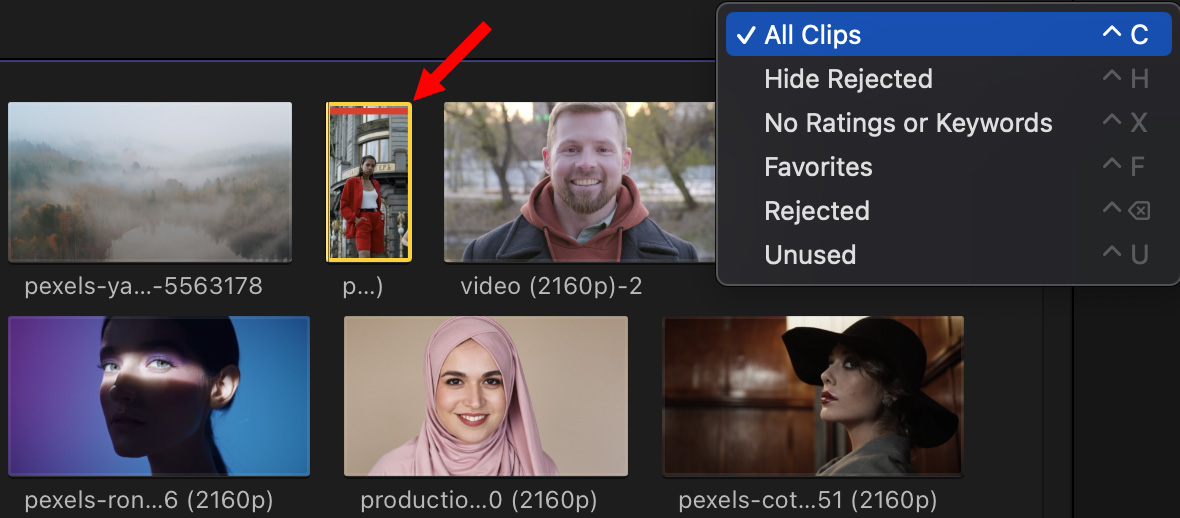
For example, here a vertical clip was imported, which I didn’t want. To reject it, select the clip – or range, or group of ranges – and press Delete, or choose Mark > Reject.
Instantly, that clip disappears from the Browser, BUT! it isn’t gone.
Change the Browser menu from Hide Rejected (the default setting) to All Clips and all clips are shown. Those with a red bar at the top are rejected (red arrow), but still contained in the Library. To hide them, change this menu back to its default: Hide Rejected.
NOTE: To actually remove a clip from the Library, select it in the Browser and type Cmd + Delete.
To unreject a clip, select it and type U. Yup, the exact same process as un-favoriting a clip.
SUMMARY
I don’t reject clips very often, most of the time I just delete them from the library. However, I do use Favorites as a very fast way to create a selection of clips I like.
EXTRA CREDIT
This allows you to organize clips into as many different Events as you want, yet still quickly find Favorites when you need them.
