Create Custom Video or Audio Effect Presets in Adobe Premiere Pro
 Many Adobe Premiere Pro projects use the same effects – and effect settings – over and over.
Creating these each time you need them is a waste of time. Why? Because it is easy to create custom effect presets and reuse them as often as you need.
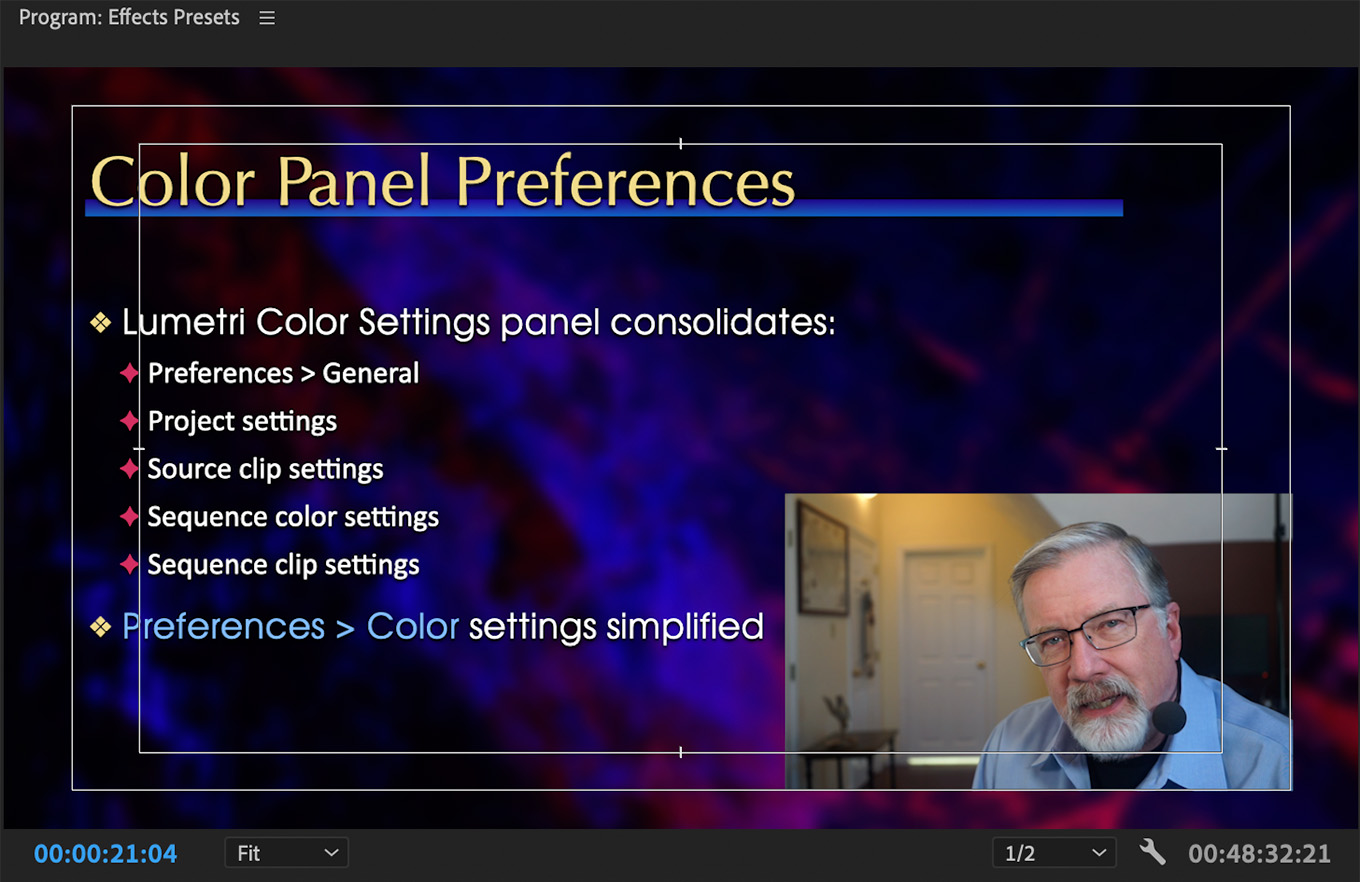
For example, in my webinar edits I frequently insert a quarter-screen video of myself superimposed over either Keynote slides or a software demo.

This video is scaled, positioned, and cropped the same for each webinar. In the past, I’d create this effect each time for each video. But, using video effect presets, it’s now a single click and I’m done.
Here’s how to create these presets.
CREATE AN EFFECT – SAVE A PRESET

To start, select a timeline clip and create whatever effects you plan to reuse. In my example, this involves changing settings for Position and Scale, then adding a Crop effect and adjusting the color grade.
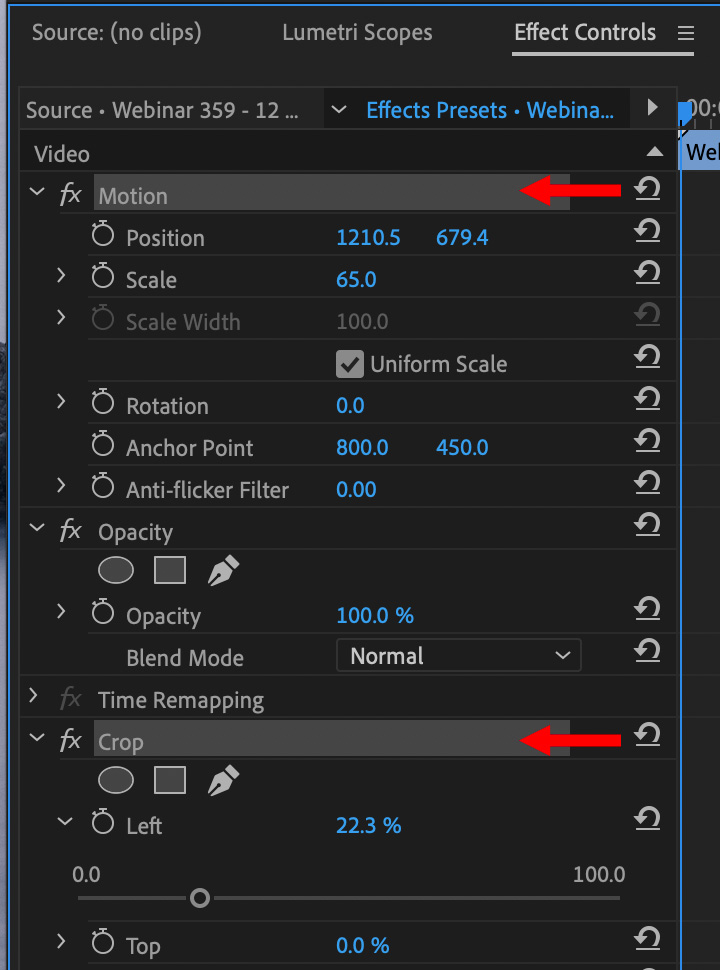
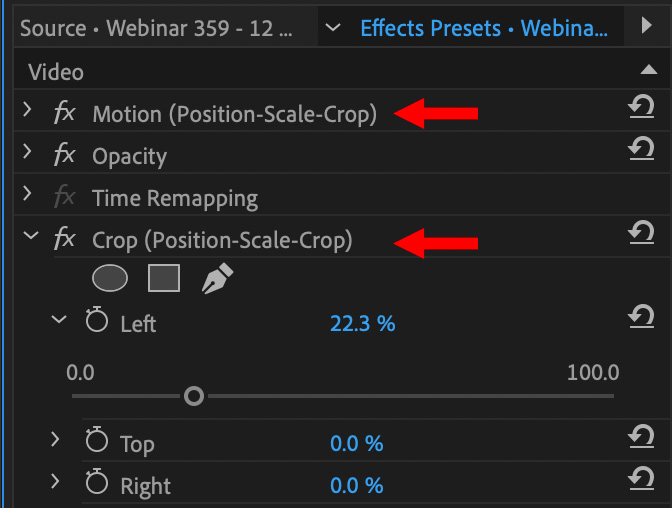
With the timeline clip selected, go to the Effect Controls panel and select the effect you want to save. (To select multiple effects, Cntrl-click (Windows) or Cmd-click (Mac) the effects you want to select.)
NOTE: In the screen shot above, I have selected both Motion and Crop. Crop is a separate effect added from the Effects panel. You can even add keyframes to animate the effect.

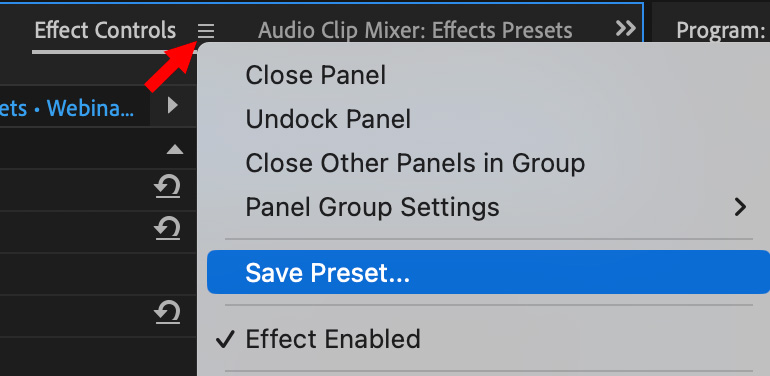
At the top, next to the words “Effect Controls,” click the panel menu (red arrow) to open the panel menu, then choose Save Preset.

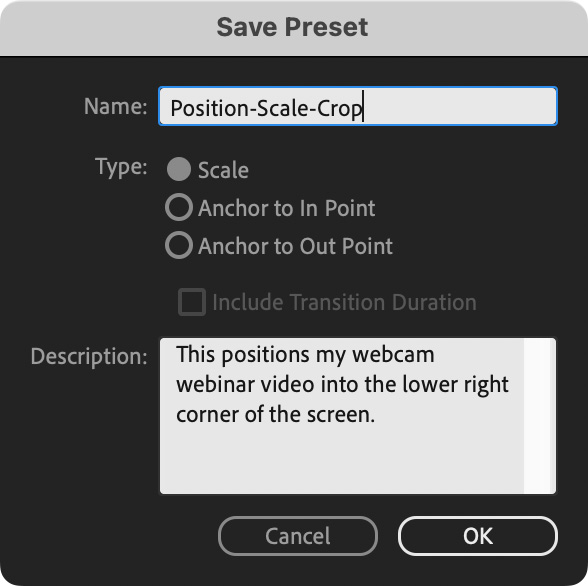
Next, give the preset a name and, if it helps, a description.
If the effect uses keyframes for animation, select one of these preset types:
- Scale. Scales the source keyframes proportionally to the length of the target clip. This action deletes any existing keyframes on the target clip.
- Anchor To In Point. Retains the original distance from the clip In point to the first effect keyframe. If the first keyframe is 1 sec. from the In point of the source clip, this option adds the keyframe at 1 sec. from the In point of the target clip. This option also adds all other keyframes relative to that position, without any scaling.
- Anchor To Out Point. Retains the original distance from the clip Out point to the last effect keyframe. If the last keyframe is 1 sec. from the Out point of the source clip, this option adds the keyframe at 1 sec. from the Out point of the target clip. This option also adds all other keyframes relative to that position, without any scaling.
NOTE: If the effect does not use keyframes, you can ignore these settings.
Finally, click OK to save the preset.

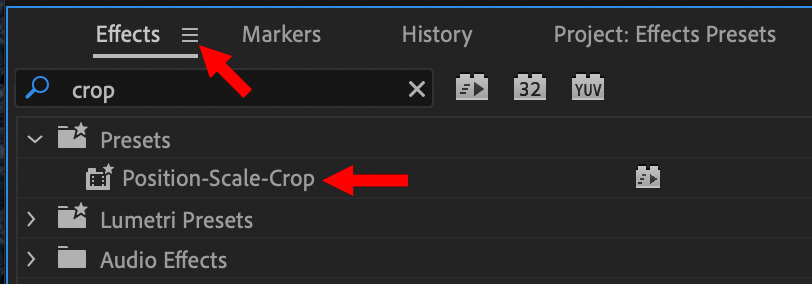
This new preset automatically appears in Effects > Presets.
APPLY A PRESET
To apply a preset, either:
- Drag the preset from the Presets bin onto the timeline clip – or –
Select the timeline clip you want to apply the preset to, then drag the preset into the Effect Controls panel.

Here, for example, notice that the new presets are applied to the Motion settings, while the Crop effect was added and configured to match the preset (red arrows).
Adobe has some special rules regarding how and where the preset is applied in the timeline:
- If the Timeline has no clips selected, then the preset is applied to the clip targeted by the drop.
- If the Timeline has clips selected, but the clip targeted by the drop is not part of that selection, then the selected clips are deselected. The targeted clip and any linked track items become selected. The preset is applied to the targeted clip and linked track items.
- If the Timeline has clips selected, and the clip targeted by the drop is part of that selection, then the preset is applied to all selected clips. The preset does not affect linked clips that are not selected.
CREATE CUSTOM EFFECTS BINS

Just as you can create bins to store clips, you can also create bins to store effects presets.
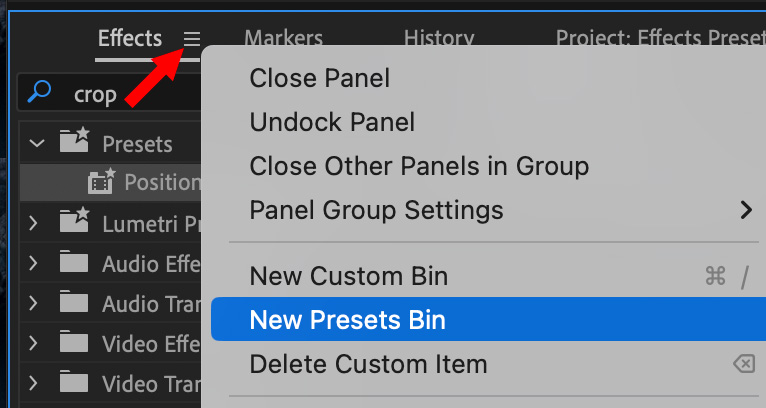
- To create a presets bin, choose New Presets Bin from the Effects panel menu (red arrow). Premiere Pro nests each new presets bin in the root Presets bin.
- Locate the effect, transition, or preset that you want to store in the bin. You may need to resize the panel so that you can see both the item and the bin.
- Drag the item to the bin. Premiere Pro creates a shortcut to the item.
- To nest a new custom or presets bin, select the bin into which you want to place the new bin, and then create a custom or presets bin.
- To rename a bin, select the bin, then click the bin name, and then type a new name and press Enter (Windows) or Return (Mac OS).
- To delete a bin or an item in a bin, select the bin or bin item, and then click the Delete Custom Items button at the bottom of the Effects panel.
SUMMARY
Creating effects presets saves time when you find yourself reusing the same effect over and over. The process isn’t hard and, once you create the preset, reusing it is a piece of cake.
EXTRA CREDIT
You can also use this exact same process to create custom audio presets. While each audio effect in Premiere supports custom settings and presets, the advantage to using this technique is that you can apply multiple effects – each with custom settings – with a single click.
Here’s the Adobe Help page that explains this technique in more detail.
Bookmark the
permalink.
2,000 Video Training Titles
- Apple Final Cut Pro
- Adobe Premiere Pro
- DaVinci Resolve
Edit smarter with Larry Jordan. Available in our store.
Subscribe to Larry's FREE weekly "Edit Smarter" newsletter and
save 10%
on your first store purchase.
Read the latest Media Industry News, curated by Larry Jordan
Media News

 Many Adobe Premiere Pro projects use the same effects – and effect settings – over and over.