 One of the trickier challenges in Adobe Premiere Pro is to adjust a color grade during playback of a timeline clip. The Lumetri color panel provides tons of color controls, but no way to change them during playback.
But, there IS a way. Here’s how.
NOTE: For simplicity, to illustrate how this technique works, I’m applying the color changes directly to a single clip. If you need color changes to span multiple clips, use an adjustment layer instead. The process is the same.
THE PROCESS
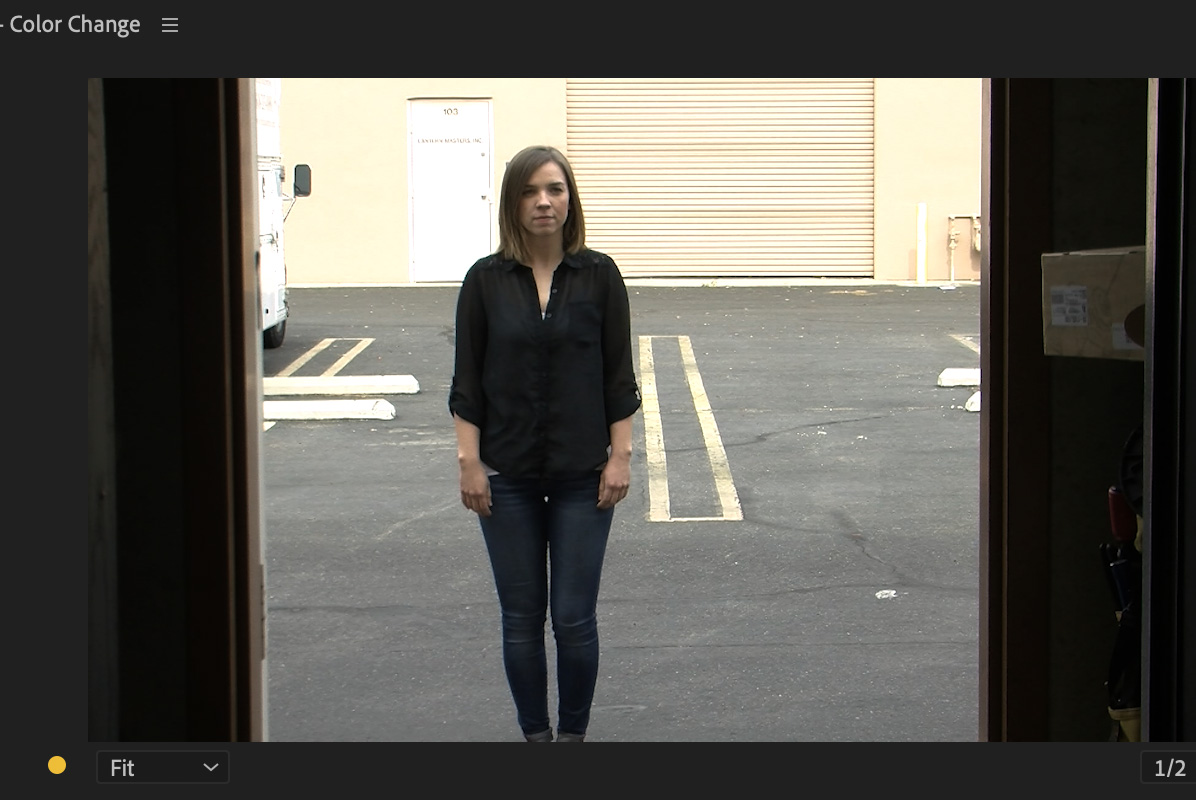
This is Lindsay. She is standing outdoors, lit by an overcast sky (roughly 5500° K). She’s about to walk indoors to a studio lit at roughly 3000° K. If we don’t do something, she’s going to go from looking good to looking decidedly, ah, orange.
To fix this, we will keyframe two different color grades, so that the grade changes as she walks into different light.
KEYFRAME: This sets a change in a specific parameter for a specific clip during playback. You need a minimum of two keyframes: a starting position and an ending position. Most keyframed effects use many more.
Once you set the first keyframe for a parameter, Premiere automatically creates keyframes for any additional changes made to that setting.
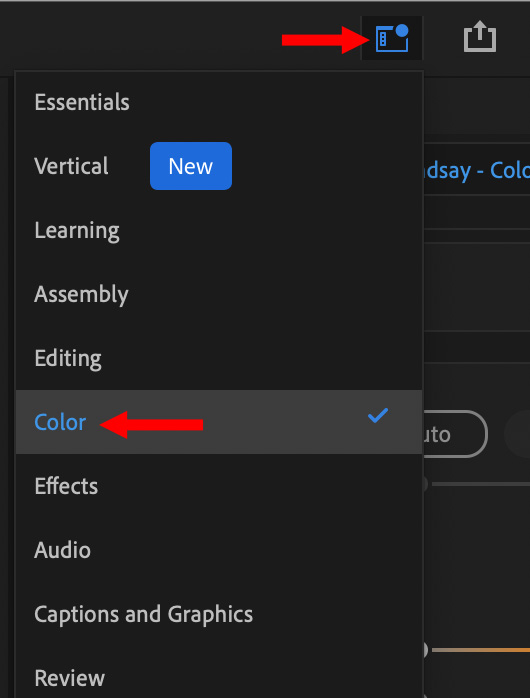
To start, switch to the Color workspace.
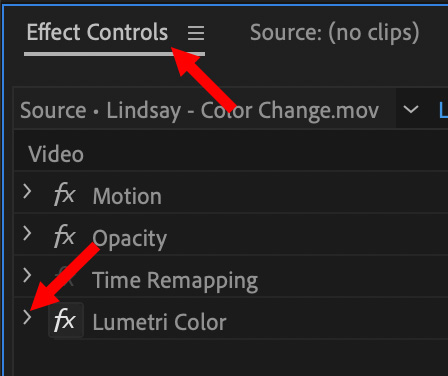
Then, open Effect Controls and click the chevron for Lumetri Color to reveal its contents.
NOTE: While you can make color adjustments in the Lumetri Color panel, you can’t keyframe them. Keyframes can only be created in the Effect Controls panel.
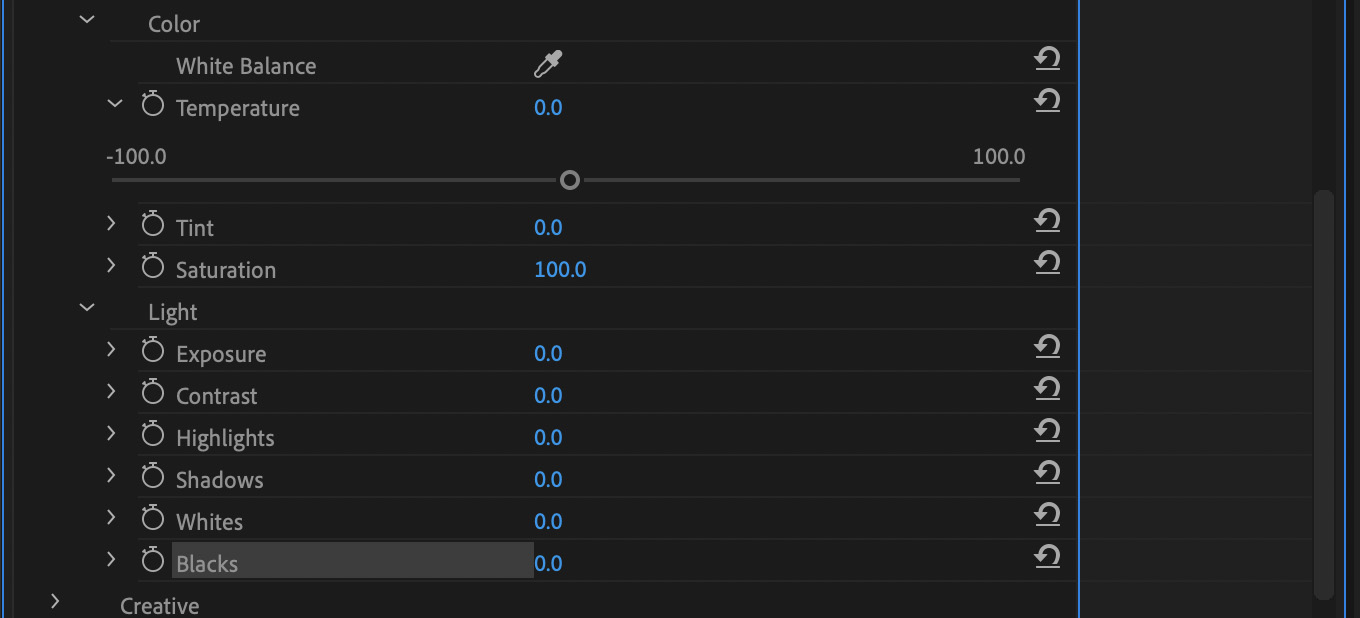
While you can keyframe most, but not all, Lumetri color settings; for this exercise – to keep the screen shots small – I’ll concentrate on simply adjusting settings in the Basic Correction category.
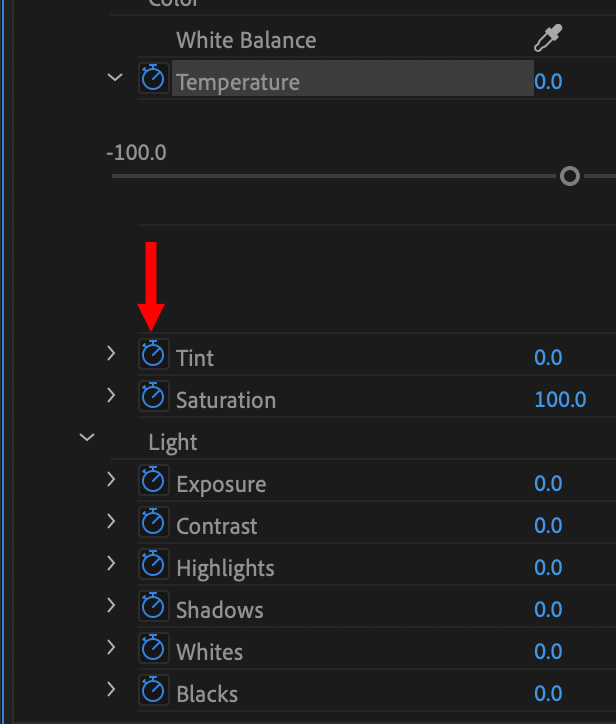
Edit the clip you want to adjust into the timeline and put the playhead on the first frame. Click the stopwatch icon next to each setting (red arrow) to create a keyframe for that setting at the position of the playhead.
NOTE: When keyframes are enabled for a setting, the stopwatch icon turns blue.
With the playhead still on that first frame, adjust color settings so the image looks it’s best.
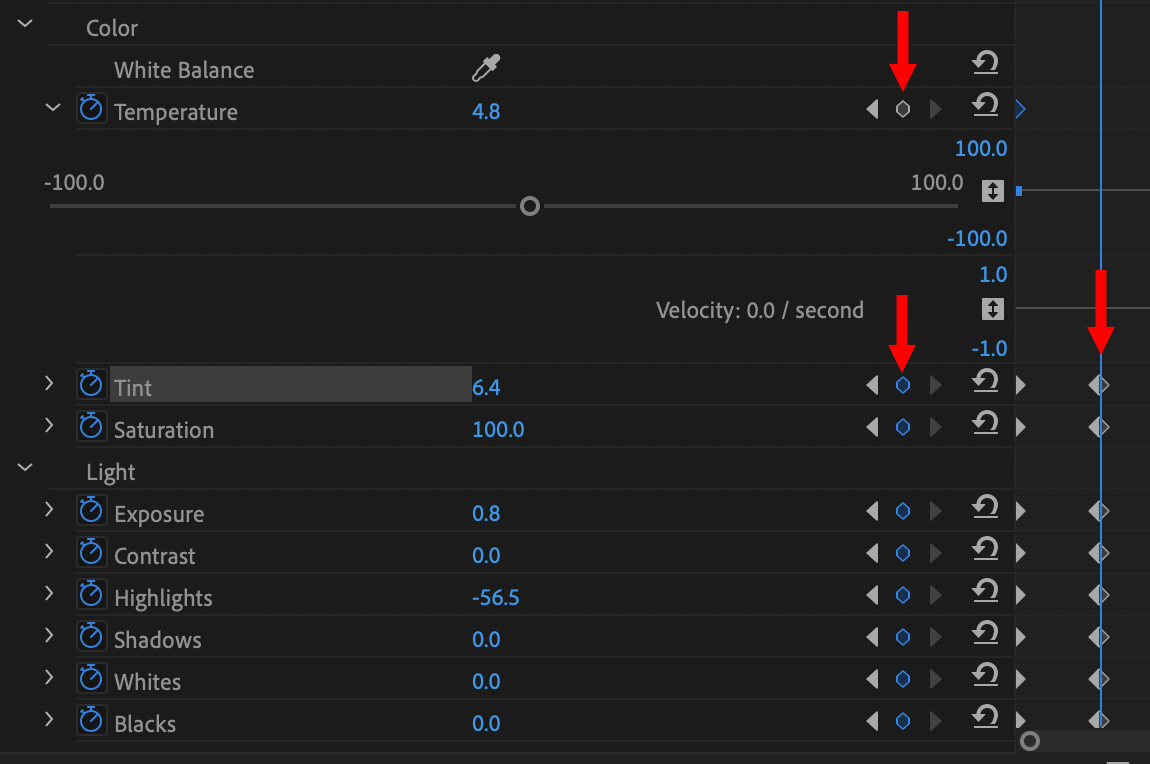
Move the playhead to the frame in the clip where you want the color change to begin. (In most cases, this is not on the first frame.) Make any necessary adjustments to make the image look good at that frame.
THEN – and this is the important part – click the gray diamond (top left red arrow) next to each color setting to create a keyframe at that frame. Many settings won’t have changed, so this keyframe keeps the setting the same from the first frame to this frame.
NOTE: The keyframe diamond turns blue when a keyframe exists for that setting at that frame. Also, on the right (right red arrow), a diamond appears showing the position for that keyframe in the clip. Keyframes can be moved, deleted, or include acceleration or deceleration. Most of the time, a simple keyframe is all that’s needed for color grading.
To delete all keyframes for a parameter, click the blue stopwatch icon and start again.
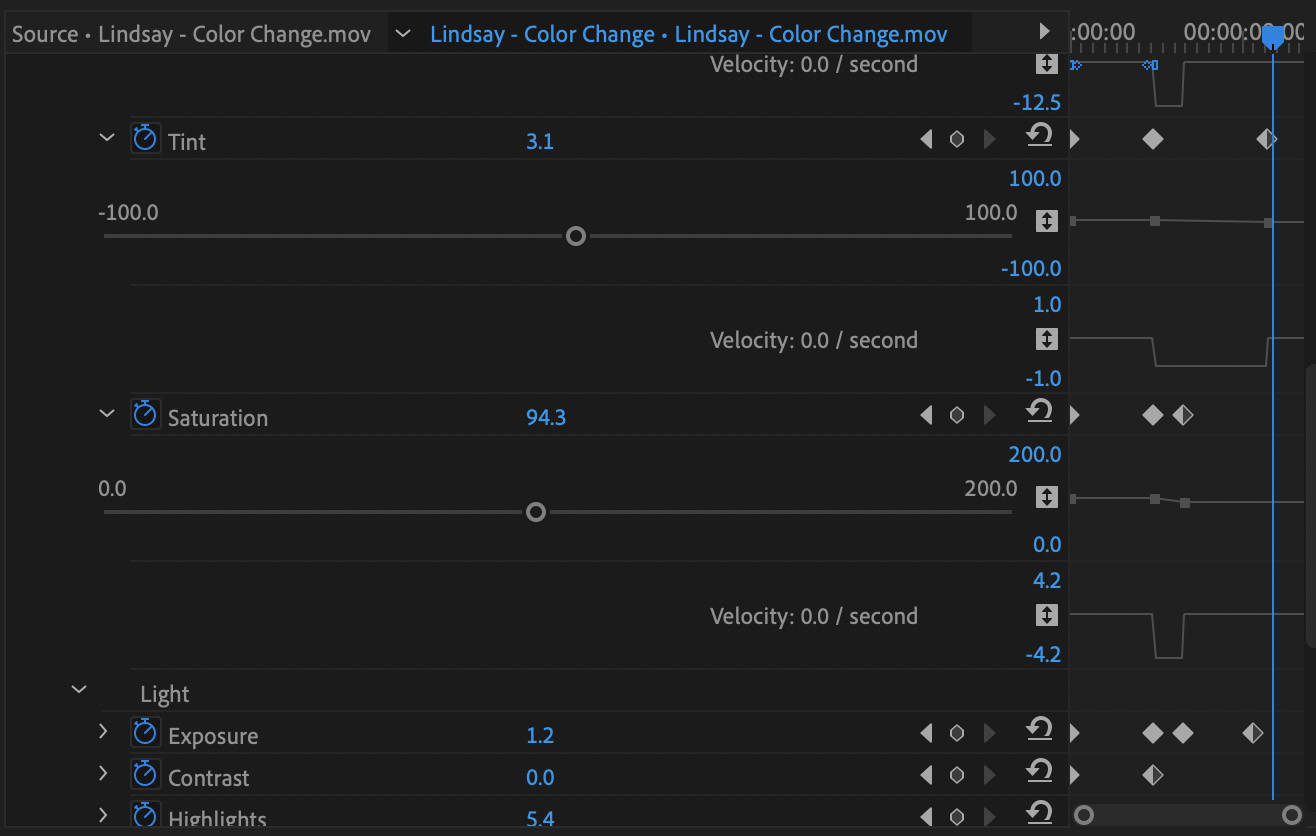
Move the playhead to the frame where you want the color adjustment to end. (In my case, it’s when Lindsay is fully inside the studio and lit with studio lights, rather than daylight.)
Again, make changes to make the new lighting look good.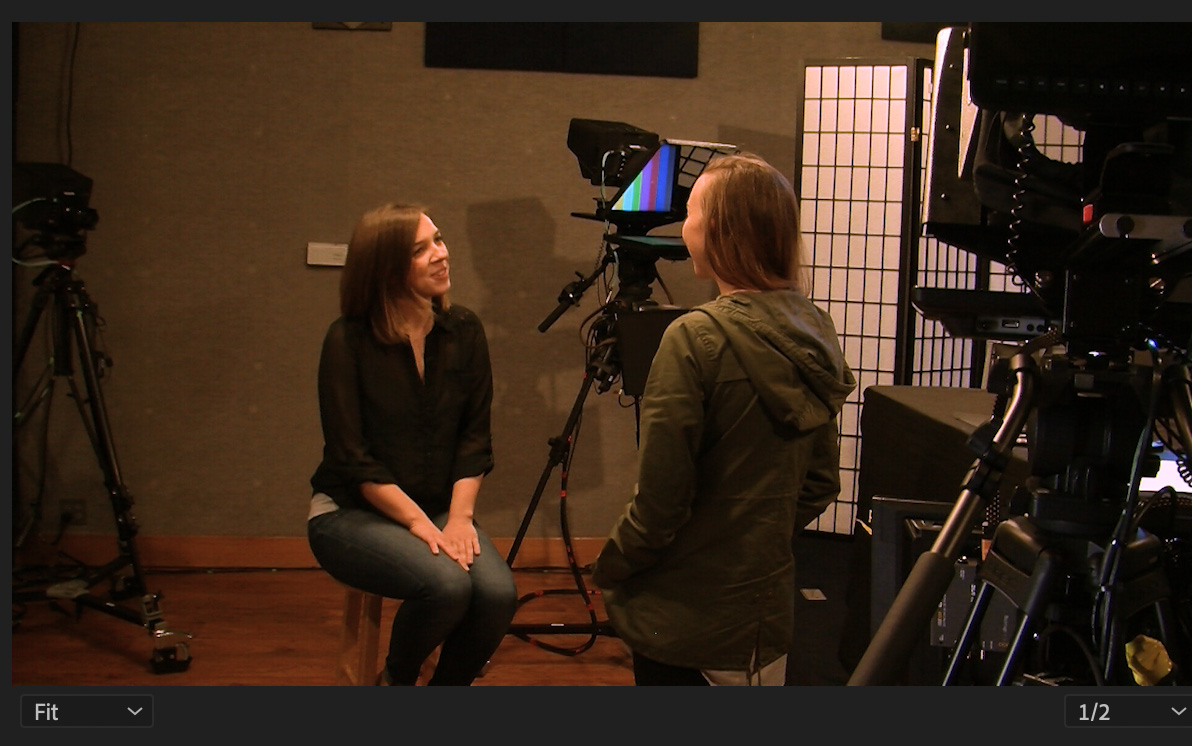
Feel free to continue tweaking as needed. Remember to use the video scopes to make sure video levels stay safe and that skin tones remain close to the skin tone line.
NOTE: There’s a lot we can do with keyframes in Premiere. Here’s an Adobe Help page that explains keyframes in detail.
SUMMARY
The key is to set keyframes both to indicate when a parameter changes and when it doesn’t. Play with this technique a bit – it can take a few tries to understand what’s going on. Once you learn it, though, you’ll find it invaluable to making color adjustments to compensate for changes happening inside a clip during playback.
One Response to Keyframe Color Corrections in Premiere Pro
Thanks, Larry. This is a great tip!