FCP X: Looking at the View Menu
 Ever wonder what all the options mean in the View Menu in the top right corner of the Viewer in Apple Final Cut Pro X?
Me too. And, as I was writing this I realized that Apple added a new feature with the 10.4.7 update to Final Cut.
Let’s take a look.
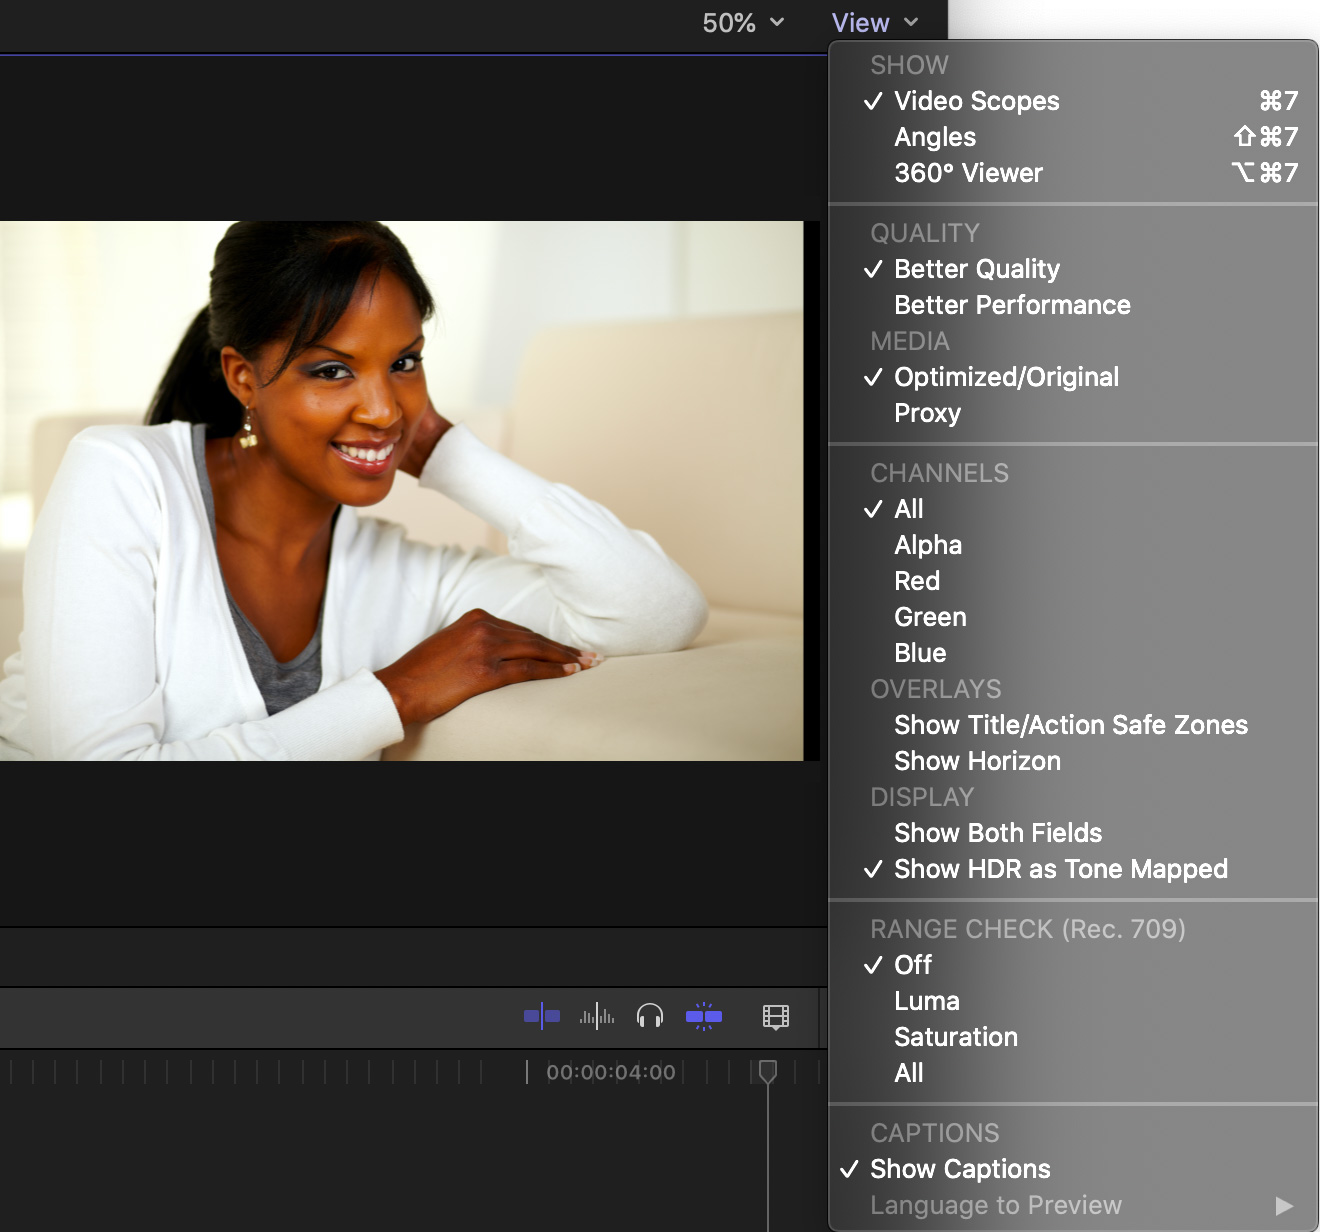
The menu is divided into five sections:
- Show
- Quality
- Channels
- Range Check
- Captions
Some of these options are also in View > Show in Viewer; but most are only available here.
SHOW
This section determines which additional elements to display along with the image in the Viewer.
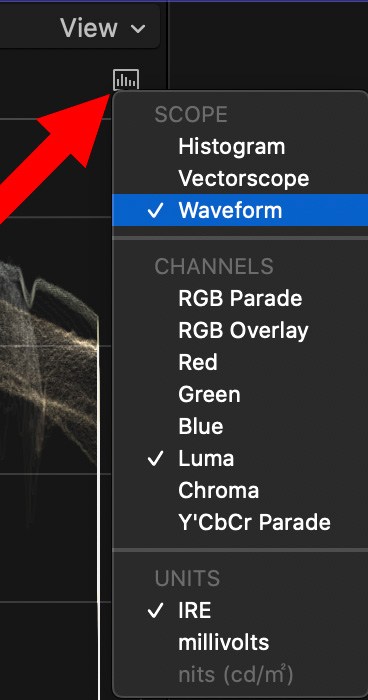
- Video Scopes. When checked, this displays the video scopes. Which scopes are displayed is controlled from the small icon just below the View menu in the top right corner of the video scope panel. (See screen shot above.)
- Angles. When checked, this displays different camera angles for editing multicam clips.
- 360° Viewer. When checked, this displays a special viewer for 360° VR video.
QUALITY
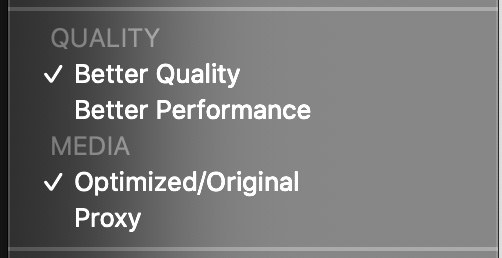
This section determines the image quality displayed in the Viewer, as well as the type of media being edited.
- Better Quality. This displays every pixel in each frame. This requires a high-performance CPU and GPU for smooth playback at large frame sizes, but displays the best image and graphic quality during playback.
- Better Performance. This displays every other pixel in each frame. This allows smooth playback on older or slower systems. This image quality “reduction” only occurs during playback. When the playhead is stationary, the image is at best quality.
Neither of these options decrease requirements for storage performance, this just lightens the load on the CPU. Also, export is always at the highest quality, regardless of which of these options is selected.
- Optimized/Original. If media has been optimized, the optimized format is edited. If not, the camera native media is edited.
- Proxy. If proxies exist, editing switches to proxy files. If not, the screen displays red boxes for any proxy media that does not exist.
This provides a fast way to toggle proxies on or off. (To create proxies, select the clips to convert in the Browser, not the timeline, and choose File > Transcode Media.)
NOTE: This setting does affect export. If proxies are selected, that’s the format that will be exported.
CHANNELS
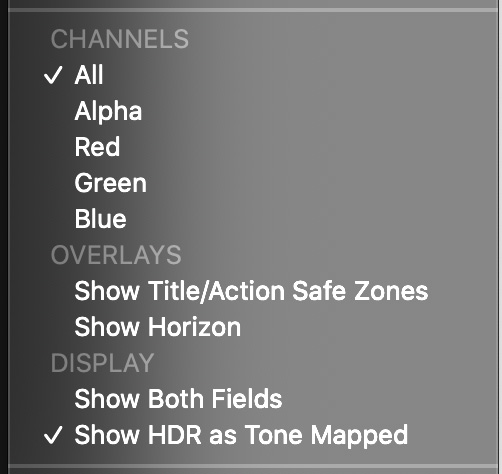
This section allows you to see individual color channels for clips in the timeline.
- All. Displays all color channels combined into a single image; red, green and blue.
- Alpha. Displays transparency information for whatever clip contains the playhead. Solid white means fully opaque, solid black means fully transparent, gray indicates translucent.
- Red, Green, Blue. Displays the selected color channel as a gray-scale image.
Overlays
- Show Title/Action Safe Zones. Displays rectangles representing Action Safe (5% in from all edges) and Title Safe (10% in). These are used to place graphics, text and other essential elements to avoid getting cut off in transmission. These are used primarily for broadcast, cable and digital cinema, though I recommend keeping all text inside Action Safe just on general principles.
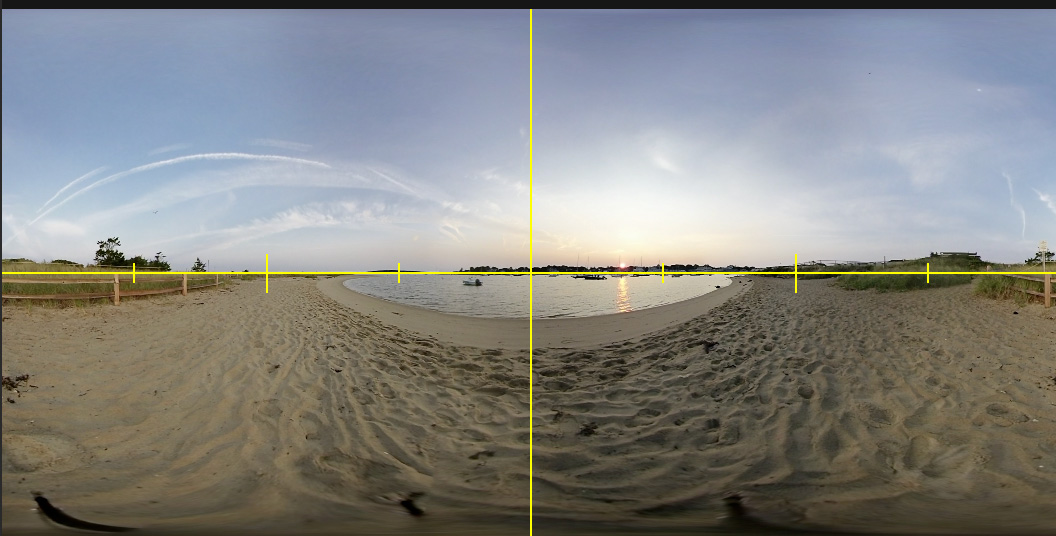
- Show Horizon. This displays a level horizon in the Viewer for 360° VR video.
Display
- Show Both Fields. When editing interlaced footage, this allows you to see both even and odd fields; normally only one field is displayed. This is most helpful when trying to fix a flash frame in interlaced video.
- Show HDR as Tone Mapped. This is a new option in FCP X 10.4.7. “In Final Cut Pro 10.4.7 or later, you can choose how to view HDR video in the viewer. The available options depend on the capabilities of your display and which version of macOS you’re using. On systems with macOS Catalina 10.15 or later, you can view HDR video in the viewer with tone mapping applied, which compresses bright image content and reduces the apparent dynamic range of the video to fit the viewable range of your display. On systems with macOS Mojave 10.14, you have the option to show details in HDR video. This “flat” view is helpful when you need to see pixel details (for example, to select an area with an eyedropper or add a Draw Mask effect).” (Apple Help Files)
RANGE CHECK
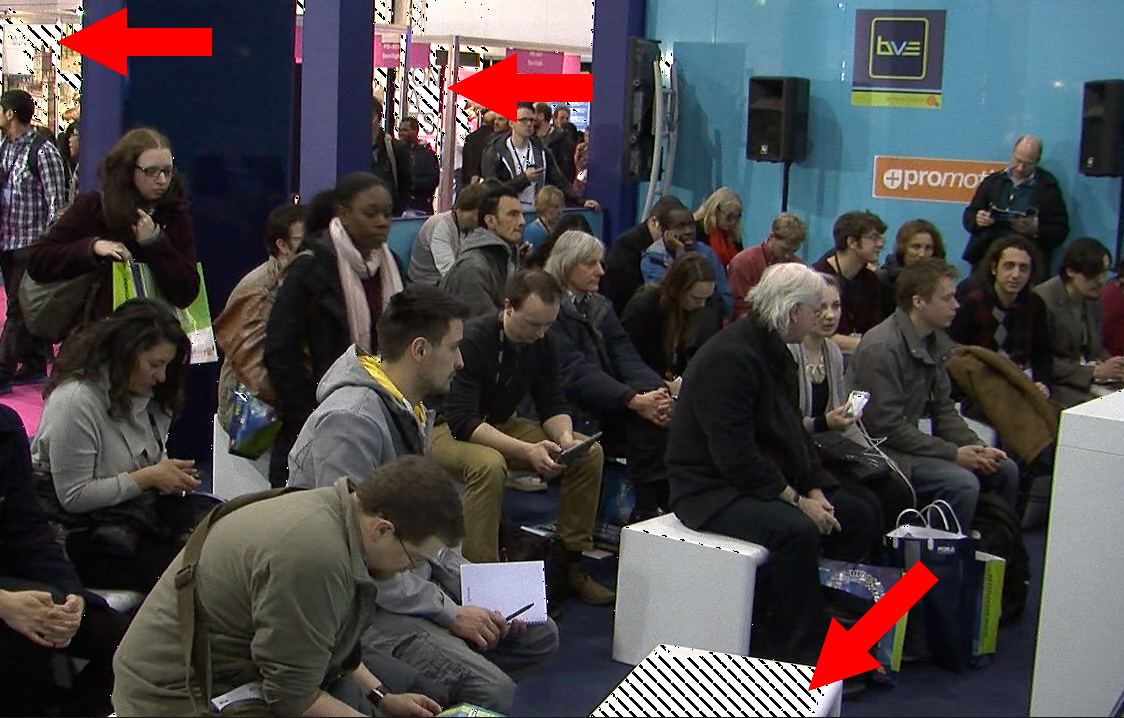
This places a “herringbone” overlay on video levels that exceed “safe” amounts, as determined by the Rec. 709 spec.
- Off. Range check is turned off.
- Luma. Flags highlights in excess of 100% (illustrated in the screen shot above).
- Saturation. Flags excessive saturation levels. Most often these occur from computer-generated graphics, not cameras.
- All. Flags both excessive highlights and saturation.
CAPTIONS
This section toggles captions on or off and, if multiple languages are selected, allows you to pick the language to be displayed.
SUMMARY
Apple keeps evolving this menu to give us more control over what we see during editing. And, now you know what the options mean.
Bookmark the
permalink.
2,000 Video Training Titles
- Apple Final Cut Pro
- Adobe Premiere Pro
- DaVinci Resolve
Edit smarter with Larry Jordan. Available in our store.
Subscribe to Larry's FREE weekly "Edit Smarter" newsletter and
save 10%
on your first store purchase.
Read the latest Media Industry News, curated by Larry Jordan
Media News

 Ever wonder what all the options mean in the View Menu in the top right corner of the Viewer in Apple Final Cut Pro X?


3 Responses to FCP X: Looking at the View Menu
Hi, my View menu has suddenly disappeared (along with the % size of the window). I now have Position info (X, Y) above my browser image. Not sure what I may have inadvertently clicked, but having trouble getting this View dropdown menu back. Any advice is appreciated!
Jason:
Send me a screen shot to Larry@LarryJordan.com.
Thanks,
Larry
the same thing happened to me. My viewer reads “position” and there is no viewer menu anymore. How do I fix this? Please help.
Thank you!