 What I’ve learned over the years is that the best way to think about the projects we are creating is when we can view clips in context by playing them in the Timeline.
This means that, for me, the faster I edit clips into the Timeline, the more time I have for crafting my story by organizing and trimming my clips.
As I watch my students, especially those who are new to editing, more often than not, they drag the clips from the Browser into the Timeline. This is a perfectly fine way to work, but it wastes a LOT of time. And, when a deadline is crashing toward you, wasting time is not something that’s high on your agenda.
So, here are several ways to edit and trim clips from the Browser into the timeline – faster!
EDITING SHORTCUTS
![]()
(Editing icons (L to R): Connected Clip (Q), Insert (W), Append (E), Overwrite (D))
| Shortcut | What It Does |
|---|---|
| E | Appends (Edits) all selected Browser clips to the end of the timeline in the order they were selected |
| W | Insert edits all selected Browser clips at the position of the playhead/skimmer |
| D | Overwrite edits all selected Browser clips at the position of the playhead/skimmer |
| Q | Edits all selected Browser clips on the first available layer above (video) or below (audio) the Primary Storyline |
The key point to note is that ALL selected clips are edited, in the order you selected them. You don’t need to limit yourself to one clip at a time. For example, if you have gathered a group of selects, Cmd – click the clips or ranges in the order you want them to appear in the timeline, type E and, poof!, all selected clips are instantly edited to the timeline in order!
NOTE: Look at your keyboard. See how E – W – D – Q all fall easily under the fingers of the left hand. This allows right-handed editors to keep one hand on the mouse and the other on the keyboard to edit clips as fast as you can decide which clip to edit next.

In addition to HOW you edit, you can also control WHAT you edit.
| Shortcut | What It Does |
|---|---|
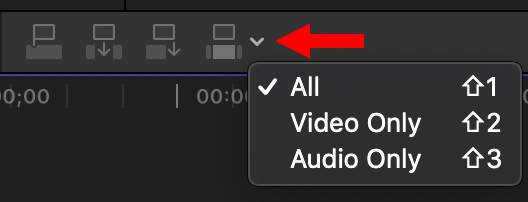
| Shift + 1 | Edit both audio and video into the timeline |
| Shift + 2 | Edit video-only into the Timeline |
| Shift + 3 | Edit audio-only into the Timeline |
NOTE: These options need to be enabled before making the edit.
POSITION TOOL

One of the BIG! (!!!) complaints at the launch of Final Cut Pro X was the Magnetic Timeline. Now, we are used to it. Then, it was shockingly revolutionary.
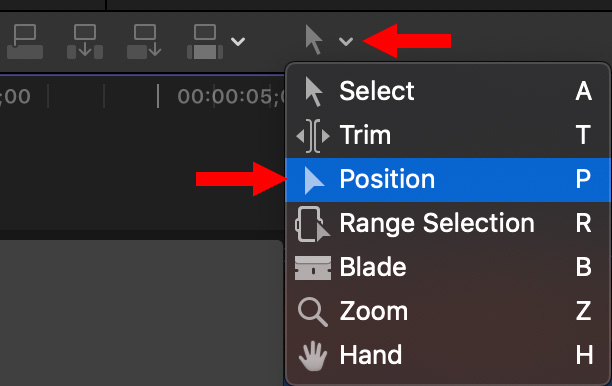
If you are having problems wrapping your brain around how FCP X automatically snaps clips together in the Timeline, switch to the Position tool. (Shortcut: P) When the Position tool is enabled, instead of snapping, clips remain wherever you drag them.
This is a very useful tool when you are trying to spot a clip to a specific time, rather than with the flow of a story. I used this technique all the time in my podcast: Digital Production Buzz. I would spot commercials every eight minutes, with silence in between. The Position tool made this easy.
TRIM TOP AND TAIL

This isn’t really an editing tool, but it speeds trimming. These shortcuts ONLY work in the Timeline.
| Shortcut | What It Does |
|---|---|
| Option + [ | Trims the start of a clip to the position of the playhead/skimmer |
| Option + ] | Trims the end of a clip to the position of the playhead/skimmer |
| Option + \ | Trims a clip to its selected range |
Trimming the top and tail of a clip has never been faster.
SUMMARY
When you are new to software, dragging clips and edit points is always the best choice, because it works and you can easily see what you are doing.
But, when speed matters, nothing is faster than these shortcuts. These can save hours in even a simple edit. Which leaves you more time for the fun part: telling stories.


One Response to Faster Ways to Edit in Final Cut Pro X
Very helpful! Thank you