
![]() I was doing some research recently to figure out the best way to export media from Final Cut Pro X. Here’s what I learned.
I was doing some research recently to figure out the best way to export media from Final Cut Pro X. Here’s what I learned.
SIMPLE EDITS
Let’s say you shot a video using any 4:2:2 or 4:2:0 codec – in other words, just about any non-RAW codec. For example, most Panasonic and JVC cameras shoot 4:2:2 while most DSLR’s shoot 4:2:0.
NOTE: The numbers refer to the amount of color information recorded by the camera, compared to gray-scale data. In general, 4:2:2 images provide more color fidelity than 4:2:0. RAW formats shoot 4:4:4, which provides the greatest amount of color information.
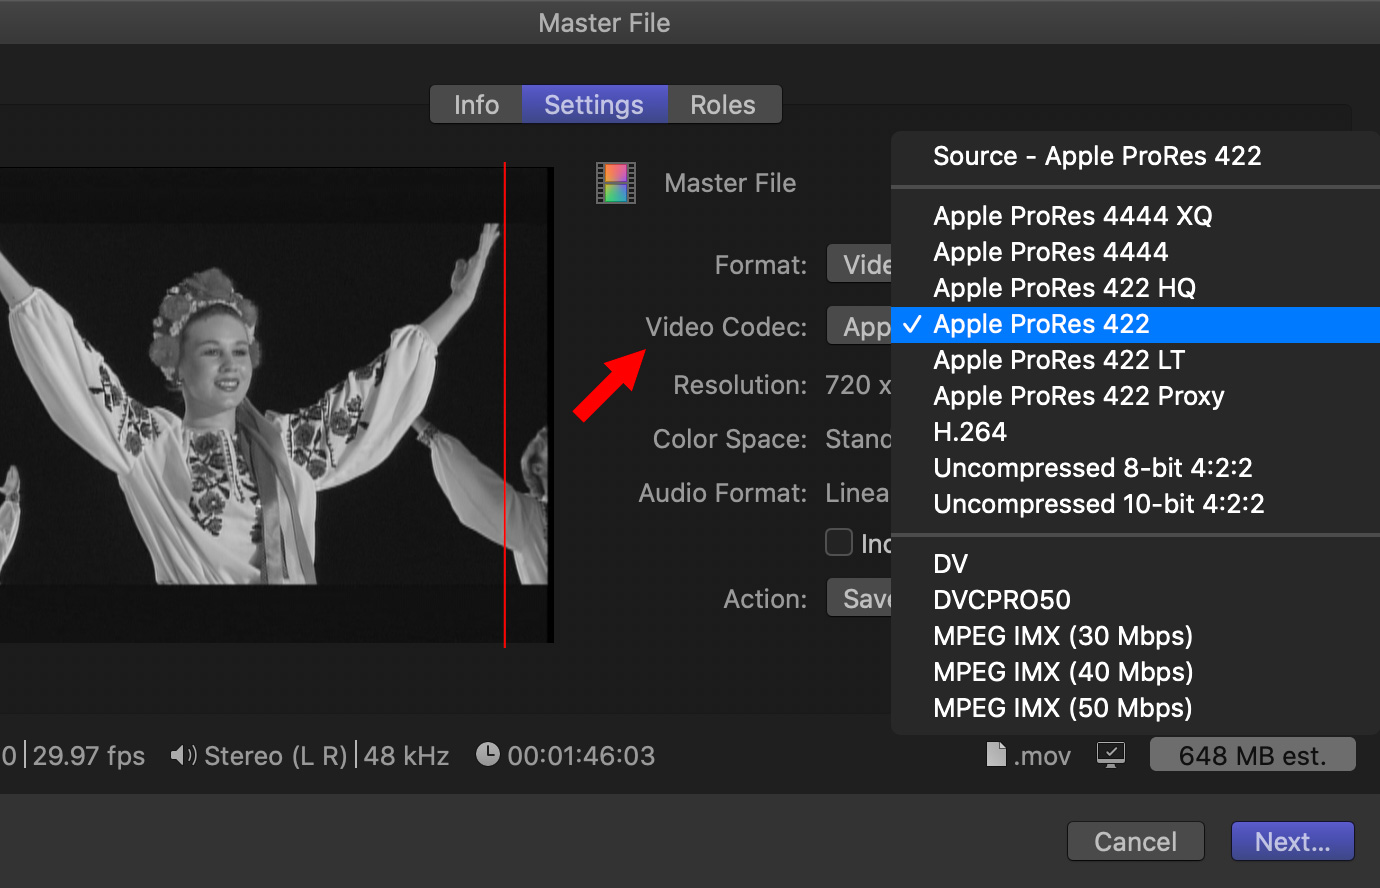
For this example, let’s say the camera native format was 4:2:2. After editing and color grading, I’m ready to export my final project. Is there any advantage to exporting ProRes 4444 master files, rather than ProRes 422?
I learned that the answer depends on the nature of your edit. If you are simply transcoding 4:2:2 camera native media to ProRes 4444 or doing a cuts-only edit of 4:2:2 material, then there’s very little advantage to exporting ProRes 4444 because the original chroma source is being interpolated or “synthesized” into the new color space. (This is similar to playing a 1080p source on a 4K display where the display is doing the upscaling. No new data is created.)
ProRes 4444 does apply a little less compression than ProRes 422, so you might have a little more quality headroom, but ProRes 422 and 422HQ are already very high quality. Also keep in mind that ProRes 4444 uses 1.5x more storage than ProRes 422HQ, and almost 2x more than ProRes 4222 for the same frame size and frame rate.
WHERE TO CHANGE SETTINGS
Let’s say we want to export using ProRes 4444, should we change the project settings or simply change the export settings. Specifically, does FCP X re-render everything in the project to meet the new export settings?
Here, the answer is more nuanced.
If you disable background rendering and never render your project, then it doesn’t matter what codec you select for the “Render Codec” project setting. Everything will be rendered from the source media during export.
However, if you have render files, then the answer depends on whether you are using File > Share > Master File to a ProRes video codec.
Your render files are only used if your render codec exactly matches the export codec. If so, then the rendered frames will be copied directly into the output file, which will accelerate the export process. If the render codec doesn’t match (like you rendered in ProRes 422 but you are exporting to ProRes 4444) then the ProRes 422 render files won’t be used. The export will be performed using the original source media.
Your render files *will* be used and therefore it is *very* important to set your render codec to ProRes 4444 if you intend to export to ProRes 4444. Otherwise you put yourself at risk for the ProRes 4444 export to be a transcode of your ProRes 422 render files!
PICK THE BEST OPTION
After this research, here are my take-aways:
If the exported file is going to end up being transcoded to H.264 or HEVC for delivery (e.g., YouTube, OTT, broadcast) then at that point it’s going to 4:2:0 anyway, so I don’t see much of a need to use ProRes 4444 personally.
If the exported file is going to be handed off to another stage for further post production work, and especially if the file contains any “true 4:4:4” sources or Motion graphics content, then ProRes 4444 might be worth it.
6 Responses to FCP X: Export the Best Image Quality Using ProRes
Hello Larry, how are you!? I just finished a documentary feature film, shot with canon dslr, edited in fcpx. I have already export using h264 video codec. You said that is much better to export prores442 first,then compress outside fcpx again into h264 to delivery on Vimeo or other?
By the way, i need to upload the film to sale on line, i know Vimeo pro, You know some other platform where people can pay per view whitout the possibility to download it? Thanks in advance! You are great! I’m your fan, all the best, cheers from Argentina
Sebastian:
The problem with exporting an H.264 project is that you are exporting 8-bit video. This will limit the results of any color grading or gradients in your project.
I prefer to export ProRes (ProRes 422 in your case) to take advantage of its 10-bit depth and create a master file from which I can create whatever derivatives I need. Having a high-quality master file means you can easily create H.264, HEVC or MPEG files all from the same high-quality master. You can’t get the same results if you start with an H.264 master.
As for Vimeo, check their Help files and see which format they recommend.
Larry
How do I export a feature film in ProRes? It’s a HUGE file!
Mark:
To export a ProRes file, select the project you want to export and choose File > Share > Export file.
Yes, ProRes is large. That’s the trade-off. High-quality files are large, compressed files, which are harder to edit and lower quality, are small.
Larry
Si tienes un Clíp nativo de cámara en H264…. No tiene sentido exportarlo como master en prores 422. El contenedor será un mov y dentro tendrá 8 bit, 420, y el mismo BITRATE aumentará por la INTERPOLACION de pasar de Interframe a intraframe del prores. Es como meter un bolígrafo en una caja de zapatos. Archivo más pesado pero la calidad es la del un h264 con compresión temporal amigo. Exportar un h264 con la máxima calidad , solamente hay que dejar el mismo codec ( h264) y en los ajustes cambiar la velocidad de bits a la misma con la que has capturado con tu cámara. Así de simple.
– – – Apple Translation
If you have a native camera clip on H.264…. It makes no sense to export it as a master in ProRes 422. The container will be a mov and inside it will have 8 bit, 420, and the same BITRATE will increase by the INTERPOLATION of moving from Interframe to intraframe of the prores. It’s like putting a pen in a shoe box. Heavier file but the quality is that of an h.264 with friendly temporary compression. Export an H.264 with the highest quality, just leave the same codec (H.264) and in the settings change the bit rate to the same with which you have captured with your camera. It’s that simple.
Marcos:
If all you are doing is cutting the original H.264 material you are correct. However, internally, Final Cut (and Premiere) convert H.264 into uncompressed 10-bit media for editing and effects. If you are doing color grading, gradients, drop shadows, transitions or other effects that manipulate grayscale values, exporting as an 8-bit H.264 file will lose quality or increase banding.
This is why I recommend exporting as ProRes – to keep that quality. However, you are correct. ProRes is a much bigger file than H.264.
Larry