
 [ Read my product disclosure statement here. ]
[Updated 8/12/2019, with corrections from Wondershare.]
Irene Yang, VP of Product Marketing at Wondershare, contacted me last week about the latest release of their video editing software: Filmora9. (This is the latest incarnation of the Wondershare Video Editor.) At the same time, they released a professional video editor named: FilmoraPro.
While not well known here in the States, Filmora is very well established in Asia. Wondershare has offices around the world, but is headquartered in Shenzhen, China. I asked Irene to send me a temporary license for Filmora9 so I could take a look at the software. Here’s what I learned.
NOTE: I hope to review FilmoraPro in the near future.
EXECUTIVE SUMMARY
Wondershare calls Filmora: “Video editing simplified.” I think this is a perfect description. There are versions for both Mac and Windows systems.
It is able to edit both HD and 4K media, and output to mobile devices, along with YouTube and Vimeo. The website seems to indicate that Filmora would not support ProRes files, but I was able to easily import, edit and export ProRes files. In fact, I could import a variety of video formats not indicated on their website.
It requires macOS El Capitan or later, 8 GB of RAM and an Intel i5 CPU or better. It supports a variety of video formats, but principally oriented to MPEG 4 and H-264 codecs. Audio supports .WAV, AIF, mp3 and many others. Still image format support includes .jpg, .png and .tiff.
Filmora is a well-thought-out video editor, emphasizing ease of use and a VAST array of visual effects and geared toward the amateur filmmaker, middle school student, video blogger or proud grandparent who needs to edit video quickly and easily with eye-catching text and effects that make images move without troubling the user with settings or a steep learning curve.
Wondershare also sells “FilmStocks,” effects template bundles, royalty-free music bundles and stock photo libraries which add additional capabilities to Filmora.
Product: Filmora9
Developer: Wondershare
Website: https://filmora.wondershare.com/video-editor/
Price: Subscriptions start at $44.99/year (Mac), $39.99/year (Windows). other pricing available. FilmStocks sold separately from the Wondershare website.
A free trial, creating watermarked video is available at the Wondershare website.
INSTALLATION
Filmora can be downloaded directly from the Wondershare website. Installation is like any other Mac software and was completed in just a few minutes.
NOTE: Filmora is also available as a direct purchase from the Mac App store. However, from what I can tell, the Mac App Store is selling version 8.5.5, while the latest version – and the one reviewed here – is 9.2.

During installation, Wondershare creates a folder inside your Movies folder where it stores all media, render files and exports.
GET STARTED
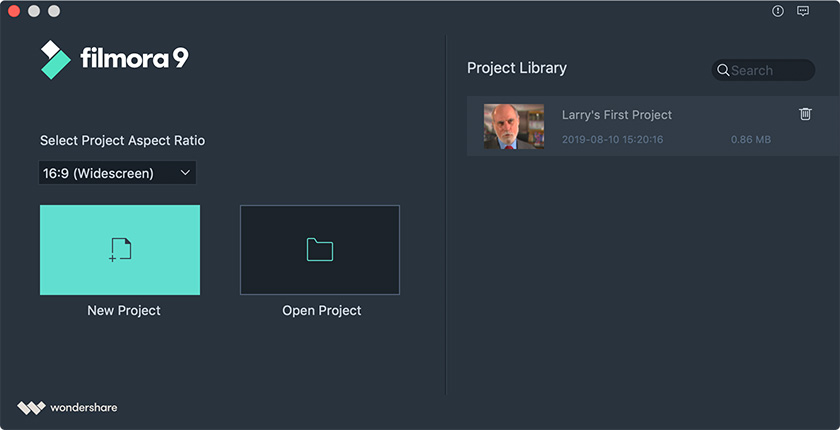
(Click to see a larger image.)
This is the startup screen when you first open Filmora9; you can see my first project listed on the right. Launch times are far faster than Premiere and about as fast as Final Cut Pro X.
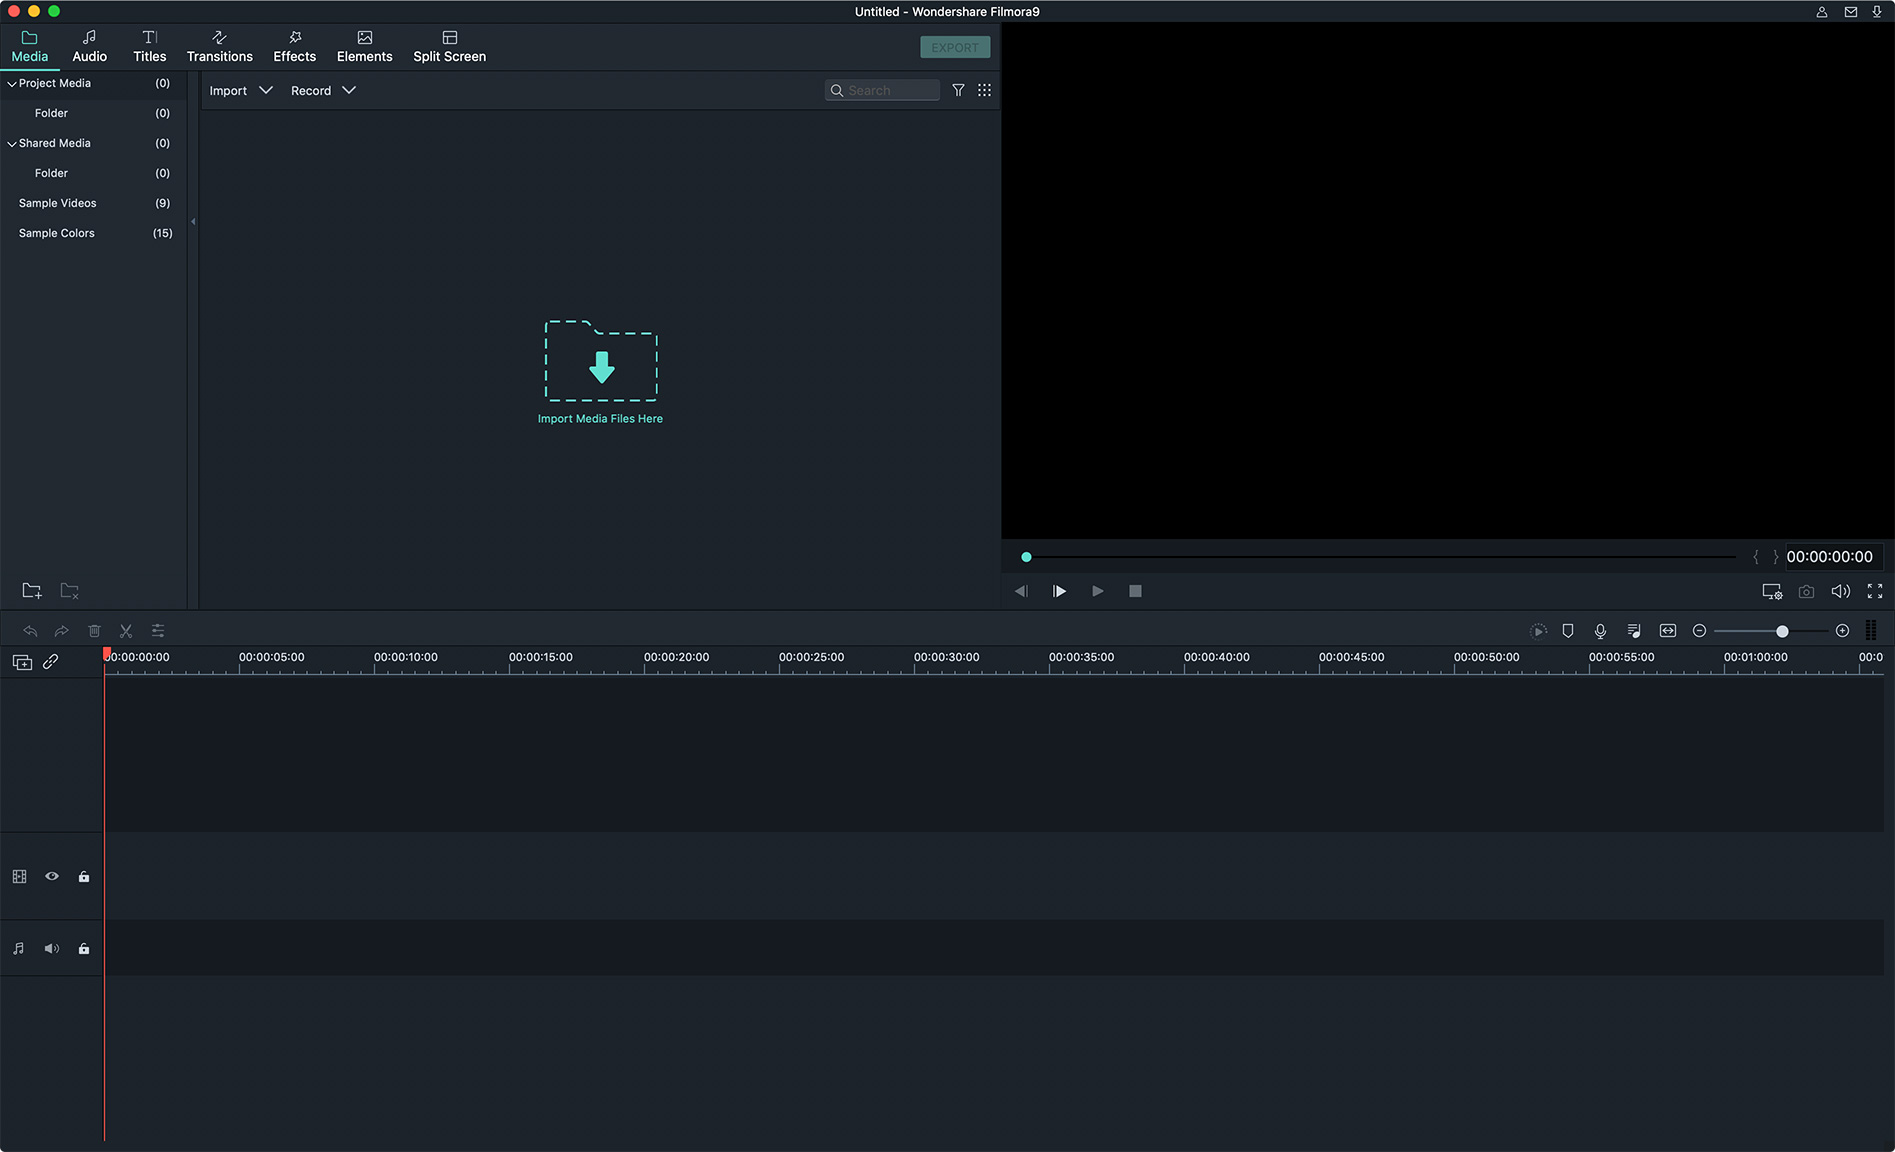
(Click here to see a larger image.)
Opening a new project displays this screen. It reminded me immediately of the dark, clean look of Final Cut Pro X. There seems to be only one timeline per project.
UPDATED NOTE: Similar to Premiere Pro CC, Filmora9 does not automatically save your work. However, Filmora9 does support Auto-Save for backups.

Browsers, Effects and Elements are located in the top left corner of the interface. This screen shot displays the contents of the Sample Videos folder.

When creating a new project, you can specify the frame size of your project. Note that while 4K frame sizes are default settings, SD frame sizes are not; though you can create whatever frame size you want using the Custom option.

Also, when creating a new project, notice the options available in the Aspect Ratio popup menu, including non-traditional formats such as social media and vertical video.

As a side note, there are a variety of preference settings, but no ability to create custom keyboard shortcuts. (Update: Custom shortcuts, I’m told, will be in the next version.) What struck me were the options in Preferences > Performance. Here we can optimize render settings as well as automatically create proxy files to smooth playback on slower systems.
NOTE: I also like the ability to delete render files when closing a project. This is very useful in minimizing storage space for short-term editing projects.
EDITING

Importing media is straight-forward, either as a file, folder or from a camera.

There is one interesting twist, however. Normally, imported media is displayed in the Project Media folder. However, if you plan to use the same media in multiple projects, import it into the Shared Media folder. This new feature means that each time you create a new project, all Shared Media is automatically imported and available to the new project. This is a big time-saver for projects that use the same elements over and over again.
I imported a variety of video formats into Filmora with no problem, including ProRes, MPEG-2 and MPEG-4. While the system does not display the native codec of the timeline, my guess is that it uses H.264, as all the clips I edited into it required rendering. Rendering, however, is fast, even on my 2017 iMac.
NOTE: My 2017 i5 iMac easily handled both video editing and rendering. I never felt that I was waiting on the system.

To edit a clip, drag it from the Project Media folder into the Timeline. Once the first clip is edited into the timeline, keyboard shortcuts for Insert (Shift+ Cmd + I) and Overwrite (Shift + Cmd +O) edits became available.

If the media doesn’t match the timeline settings, you have the option of reconfiguring the timeline.
Filmora supports up to 100 tracks of video and audio, where the foreground video clip is on the top layer.

Editing and trimming are similar to Final Cut Pro 7 or Premiere, the timeline is not magnetic, but trimming is as easy as dragging the edge of a clip.

Double-clicking a clip displays controls for Video, Audio, Motion and Color; depending upon the clip. Video controls include:
Overall, editing is straight-forward and more than adequate for simple storytelling.
NOTE: I should point out, ah, just by way of comparison, that the Timeline scrolls as the playhead moves through it.
AUDIO
Filmora supports multiple tracks of audio, but not split edits. instead, you need to detach the audio, then trim the audio clip. However, there is no indicator warning of out of sync audio and no easy way to resync detached audio with video.

It does support FCP X-style audio fades by dragging an audio slider (the white thingy) on the edge of a clip. The visual indicator for the shape of the audio fade, though, is very hard to see.

Double-clicking an audio clip in the timeline opens the audio settings in the Audio panel. Audio clip controls include:

There are more than 50 royalty-free audio clips available for download simply by double-clicking them in the Audio Browser, plus full access to your iTunes library.
A WEALTH OF EFFECTS
Oh. My. Goodness! Filmora9 has effects – hundreds and HUNDREDS of effects! Most are in the “suck-the-eyes-out-of-your-head” category, but, hey, when have web videos been subtle? Many of the effects ship with the software.

Many of the effects ship with the software while others, indicated by the green download arrow in the upper right corner, can be downloaded in seconds from the Wondershare servers. In addition, Wondershare sells bundles of effects – called FilmStocks – that focus on specific content categories such as Grafitti, Explosions or Babies.

Let’s start with motion effects. To apply a motion effect to a selected clip, such as a bounce, double-click the clip, click the Motion text button at the top, then click any effect to apply it. To remove an effect from a selected clip, click the No Animation effect in the top left corner.
These motion effects remind me of Behaviors in Motion, except I have not found any way to adjust them.

Filmora9 contains:

The screen shot above illustrates a small sample of the 191 animated elements available.
COLOR CONTROLS

The color grading controls are hidden. At first, I thought that Filmora was very weak in color correction because the controls in the Video > Color panel are extremely limited.

But, as I was exploring the Timeline toolbar, I found this icon.

This opened up a full palette of video controls. While the only video scope was a histogram, my least favorite, our ability manipulate the look of a clip – from LUTs to HSL – is extensive. I was both surprised and impressed; especially the ability to apply LUTs to clips.
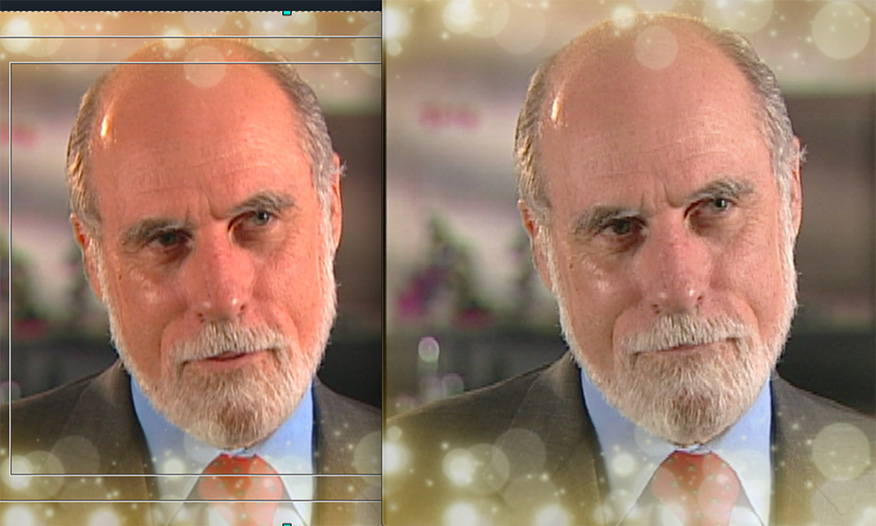 (Click to see a larger image. Image courtesy of Dr. Vint Cerf.)
However, one thing that I noticed is that images displayed inside Filmora are over-saturated. If you color correct for this in Filmora, you’ll end up with desaturated final output. Here, the left image is inside Filmora, while the right image is an exported ProRes 422 movie displayed in QuickTime Player.
NOTE: I, ah, added a Bokeh effect to this image because, um, why not?
 (Click to see a larger image.)
These color shifts varied depending upon codec. The left image is inside Filmora9, the middle image is exported as Apple ProRes 422 file while the right image is exported as QuickTime H.264.
If accurate color is important to you, be wary of this.
EXPORT
When it comes to export, Filmora9 provides options that I didn’t expect:
NOTE: Wondershare has a program called “DVD Creator” that may be the only remaining DVD creation tool on the Mac. I’m in the process of learning more about this and will write about it separately.

Here are the movie export options. Look at the format choice on the left! I don’t know any other editing package that supports this range of codecs. (This is partly due to Wondershare’s background in video compression and DVD creation.)
While QuickTime movies are limited to H.264 and MPEG-4, the full range of Apple ProRes codecs are also supported as a separate output option on the left.

Even more surprising is the Export to Device option. If you are creating videos for friends and family, exporting for a specific device makes more sense than creating a generic movie file.

You can also upload files directly to YouTube and Vimeo.
SUMMARY
Filmora is geared toward the amateur filmmaker, middle school student, video blogger or proud grandparent who needs to edit video quickly and easily with eye-catching effects that make images move without troubling the user with settings or a steep learning curve. While I wouldn’t recommend this for professional work due to its color inaccuracy and lack of control over most of the effects, it is a great way to discover the fun and magic of video editing. I am continually impressed with the thought behind its editing choices.
Much of its capability requires Internet access – either to download an effect or purchase extra Filmstock bundles – but, even without installing anything extra, there is plenty of built-in fun stuff to work with.
Filmora9 provides an easy way to get excited about the potential of telling stories with pictures – especially because so many of the titles and effects are so far over the top that, even if your video isn’t perfect, your audience will still have a fun time enjoying the results.
2 Responses to First Look: Filmora9 from Wondershare [u]
Are you able to use two monitors with Fimora 9? Like is available with Final Cut? My wife edits with Filmora 9 on her 2017 Macbook Pro and I would like to make it easier with a second monitor for timeline, viewer or browser. Just curious. Thanks
Mike:
The macOS supports multiple monitors, but whether Filmora does is a question best asked of Filmora support.
Larry