
![]() Recently, a YouTube viewer asked me how to create a generator for use in Final Cut. While FCP X ships with a number of pre-built generators, if you want to create one, you need to do so in Motion.
Recently, a YouTube viewer asked me how to create a generator for use in Final Cut. While FCP X ships with a number of pre-built generators, if you want to create one, you need to do so in Motion.
Generators are a fancy name for “computer generated animated backgrounds.” You see them all the time. Here’s how to create one in Motion.
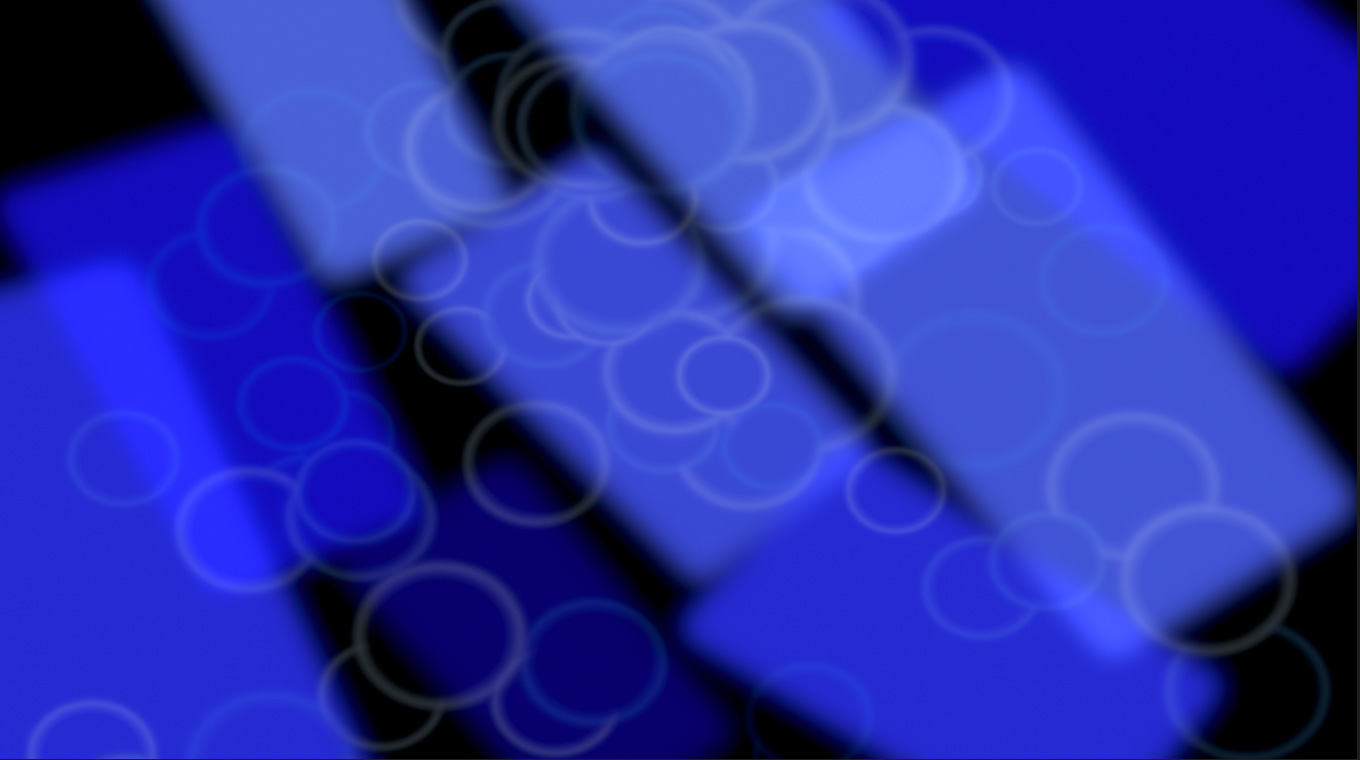
To get you oriented, this is where we are going: A fully-animated generator, ready for use in Final Cut.
GET STARTED
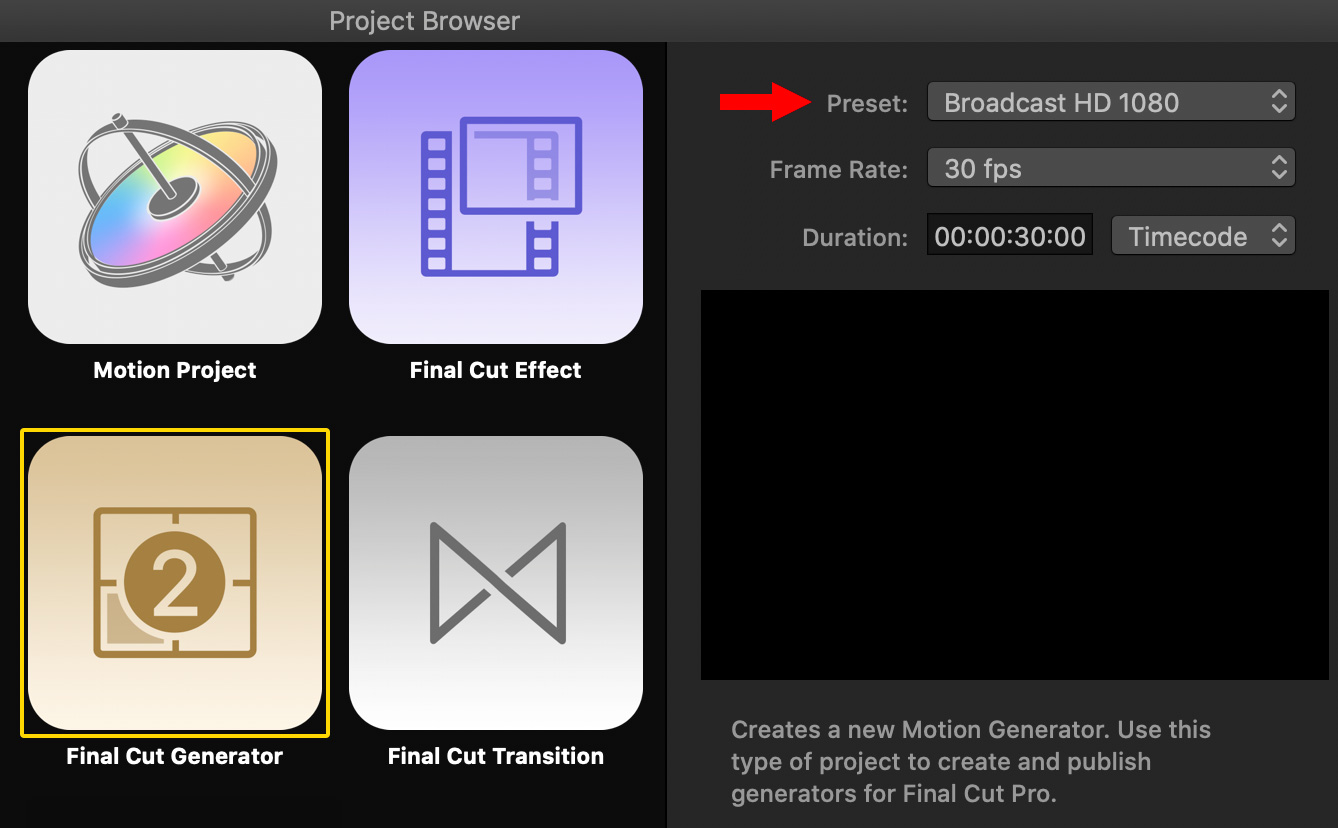
Open Motion and, in the top-right corner of the Project Browser, set the frame size, the frame rate and the duration you want to use. In my example, I chose:
In general, generators work best when they match the settings of your project. However, this is not locked in stone, generators can often be easily scaled, while changing the frame rate will change playback speed, but not the overall look.
At this point, the full Motion interface opens and we are instantly confronted by all the creative options available. Not to worry, we can solve this.
SOME SIMPLE IDEAS
You could:
For this example, however, I want to use a replicator to create a series of softly spinning shapes to provide a dark background for an infographic to be used in Final Cut Pro X. This effect will have two layers, so that we can take advantage of blend modes.
GROUP 1 – A BLUE REPLICATOR
A replicator takes an existing shape, and duplicates it within the frame, allowing us to apply animation and styling to the result. Unlike a particle system, which has life over time, a replicator duplicates a shape without providing a lifespan.
Like particle systems, there’s no “right” answer with a replicator. If you like the look, great. If not, tweak something. Anything. Both replicators and particles provide a wealth of creative possibilities. Here’s one option to get your thinking started.
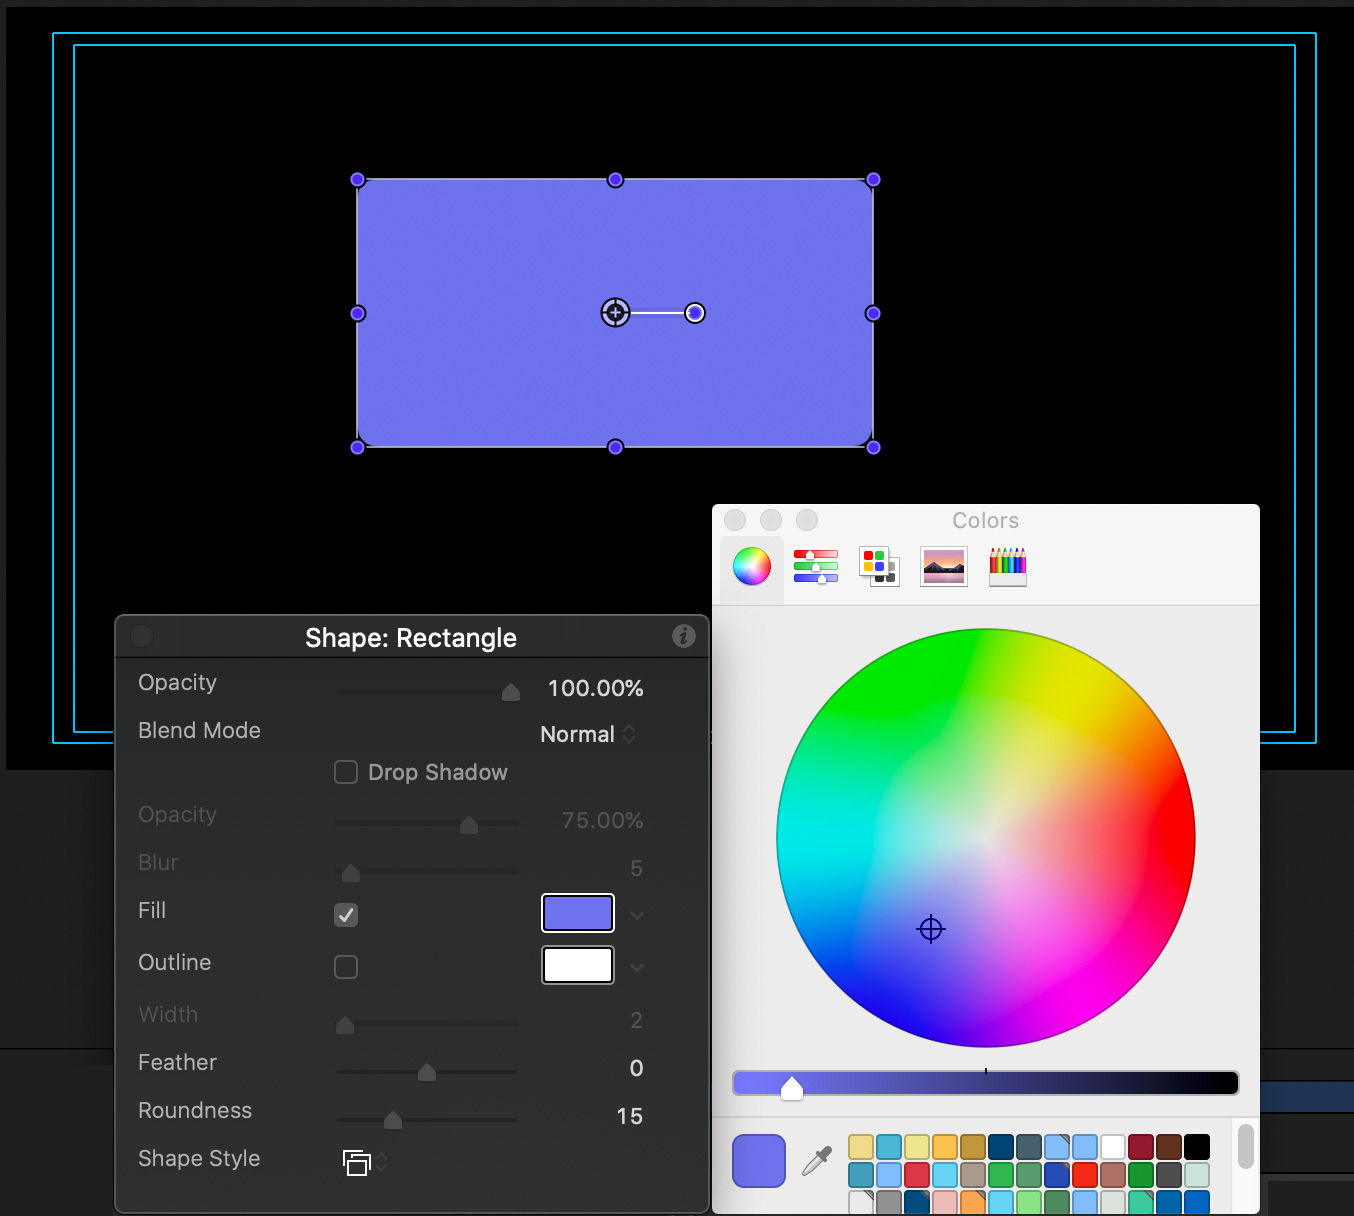
Using the Rectangle tool, create a rectangle. Make sure it starts at the beginning of your project; if not, drag it there using the mini-Timeline.
Switch to the Arrow tool, then open the HUD (icon in the top right corner of the Motion interface.) Change the color to a medium dark, medium saturated blue.
NOTE: All colors and shapes can be adjusted. My goal here is to illustrate a process. Feel free to experiment with any setting on your own!
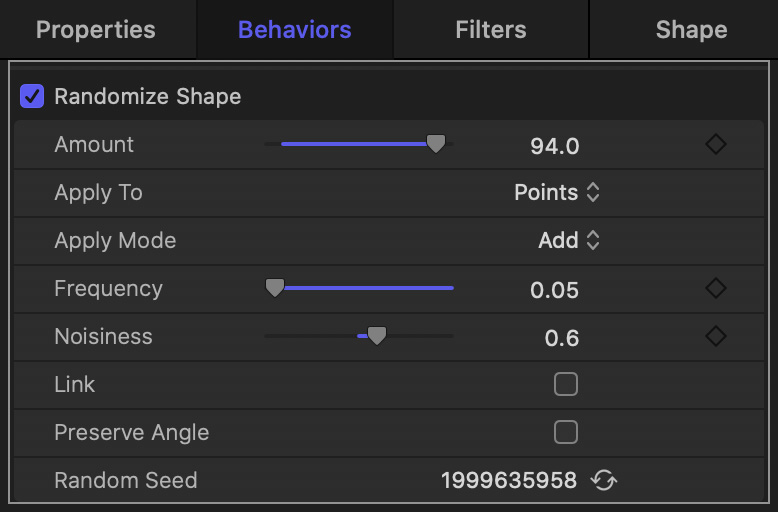
Select the Rectangle layer in the Layers panel and apply Behaviors > Shape > Randomize Shape. Then, adjust the settings to match mine. (Feel free to change the settings and watch what happens.)
Select the Rectangle in the Layers panel and click the Replicate button at the top right of the Motion interface (it’s close to the HUD icon).
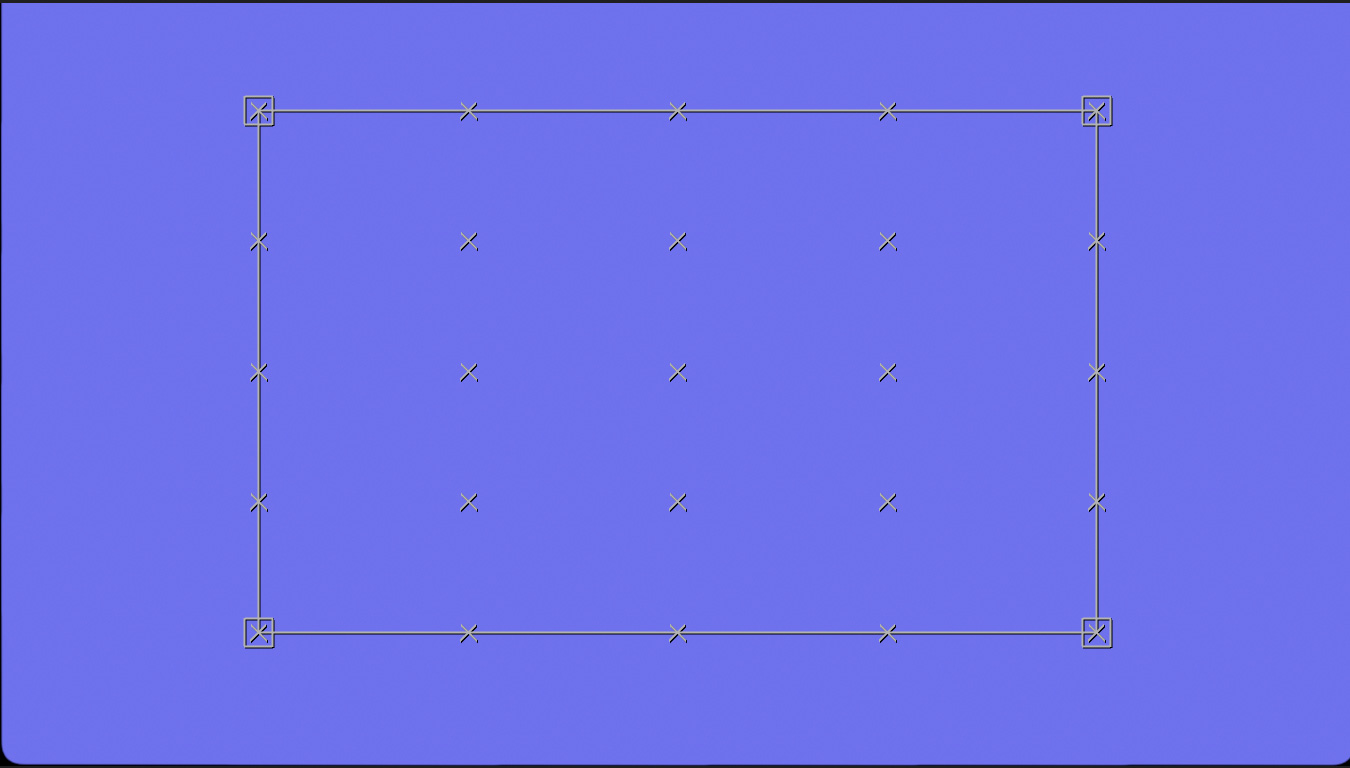
Drag a corner box until the blue fills the frame.
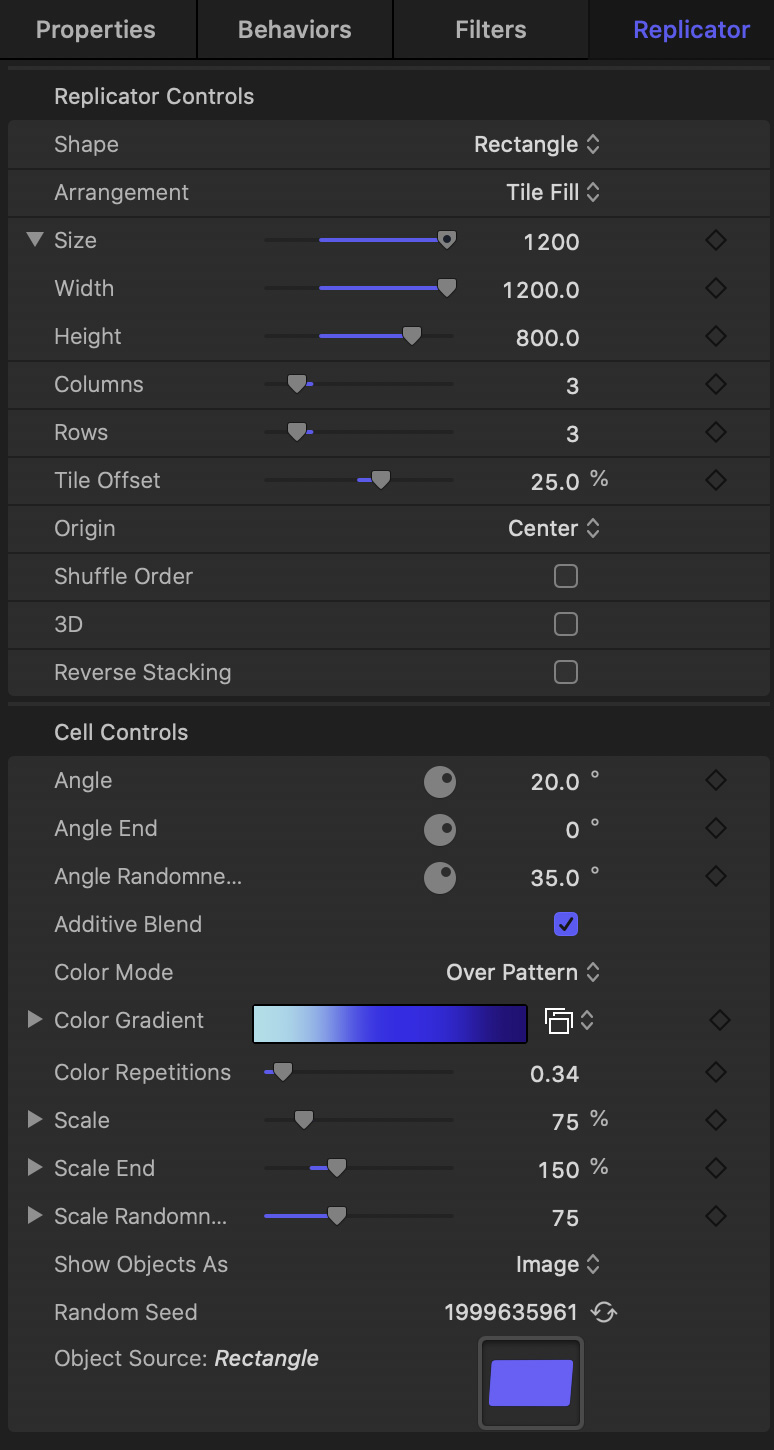
Select the Replicator layer in the Layers panel, then, go to Inspector > Replicator and change the following settings to match the screen shot above.

Finally, drag the replicator slightly off-center to the left to get things to feel more “balanced.” Play what you’ve got and see what it looks like.
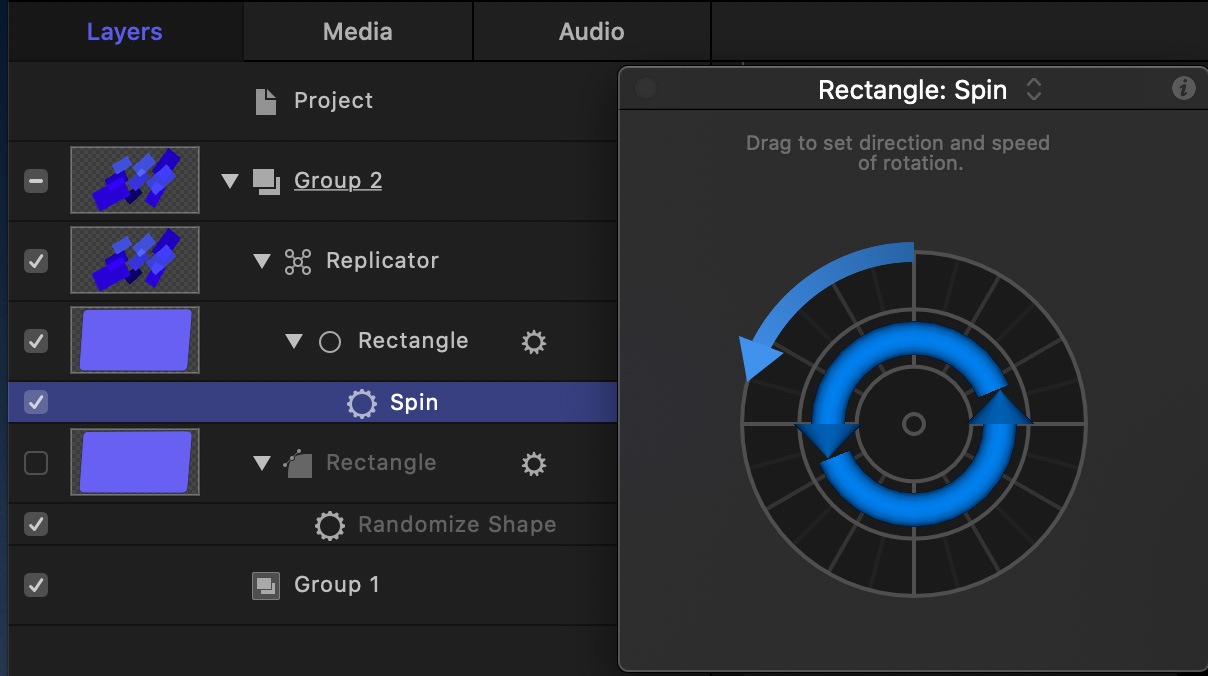
In the Layers panel, select the Rectangle indented under the Replicator and apply a Basic Motion > Spin behavior. Using the HUD, spin this to the left.
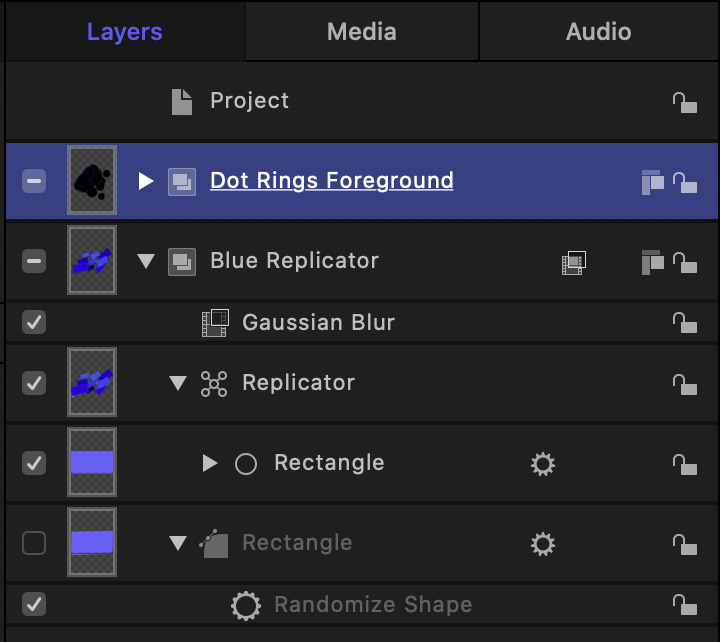
Here’s where we are now. I renamed both groups.
Twirl up the Blue Replicator group and click the checkbox to temporarily hide it.
GROUP 2 – DOT RINGS FOREGROUND
Select the top group, which I renamed to “Dot Rings Foreground.” Drag Library > Particle Emitters > Abstract > Dot Rings into that top group.
Select Dot Rings Foreground Group, then, in Inspector > Properties change the Blend Mode to Screen.
Play your work. Tweak and adjust everything until you are happy.
SAVE THIS FOR FINAL CUT PRO X
Because we selected the Generator format when we first created this project, when we save it, Motion already knows where to store it.
Choose File > Save.
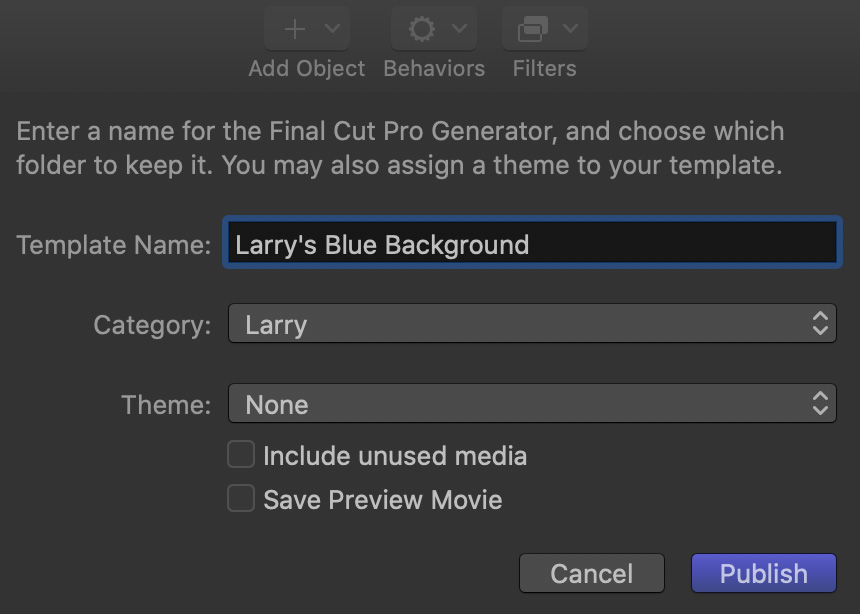
In the resulting dialog:
NOTE: You can create as many categories as you want. To create a new category, pick that option from the Category menu.
Click Publish when you are happy with your choices.
Open Final Cut Pro X.
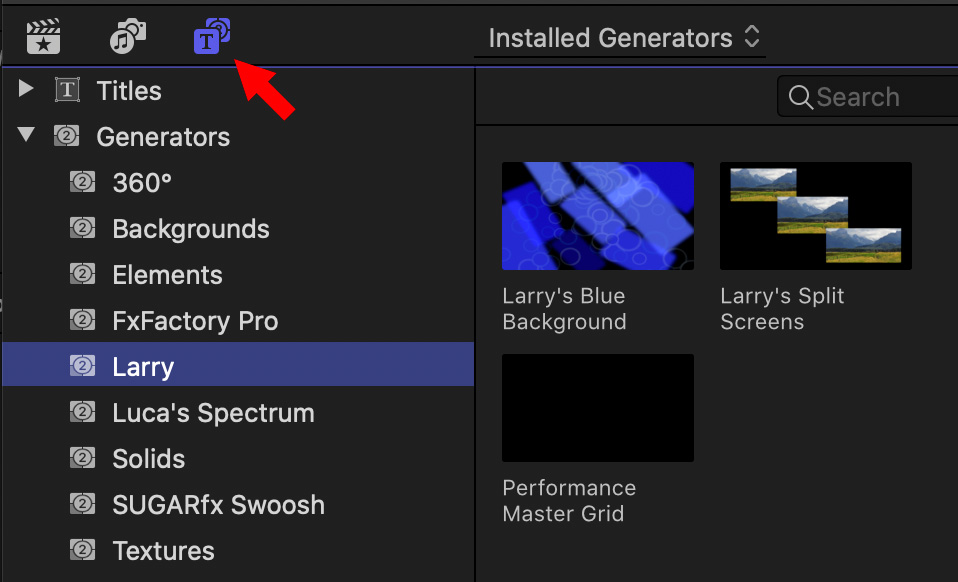
In the Generators browser, you’ll see the category you just created. Inside it, you’ll find the background we just created.
SUMMARY
As with everything in Motion, there are so many options and choices it is easy to feel overwhelmed – even lost. The easiest way to overcome this feeling is to create something simple – like a shape – then apply a Spin or Throw behavior and watch what happens. Then, start tweaking settings.
If you like the result, keep it. If not, Undo and try again. Because everything in Motion happens in real-time, you don’t waste any time rendering.
Motion is a very fun way to explore and experiment with motion graphics.
2 Responses to Create an Animated Generator in Motion for Use in Final Cut Pro X
This is a really interesting example, but unfortunately, your interface doesn’t look the same as mine?
I’m using 5.5.1 and the layout isn’t anything like yours, and being a total newbie – I’m getting lost trying to find the new control locations.
I don’t suppose you could update this tutorial to the new, 5.5.1 version of motion?
Robert:
First, I’ve created in-depth training in Motion 5.5 here:
https://larryjordan.com/store/learn-apple-motion-5-5/
Second, if you go here, you’ll find dozens of other Motion tutorials to get yourself up to speed:
https://larryjordan.com/free-tutorials/
Larry