
![]() We are all familiar with using Apple Compressor to compress media files stored on our local hard disk. But, when my new Mac mini arrived, I started wondering about whether I could use this for media compression over the network.
We are all familiar with using Apple Compressor to compress media files stored on our local hard disk. But, when my new Mac mini arrived, I started wondering about whether I could use this for media compression over the network.
The answer is: Yes! But it isn’t intuitive.
There are many benefits to using a separate system for media compression, especially if you are part of a workgroup:
NOTE: Here’s a similar article on how to network media compression using Adobe Media Encoder.
EXECUTIVE SUMMARY
This idea works and, when properly configured, works well. However, this requires:
What we need to do is set up a “compression network” using only the network computer: in this case, a Mac mini. All compression settings are unique to each job, which provides maximum flexibility to each operator while still providing solid compression speed using the network.
ABOUT THIS MAC MINI
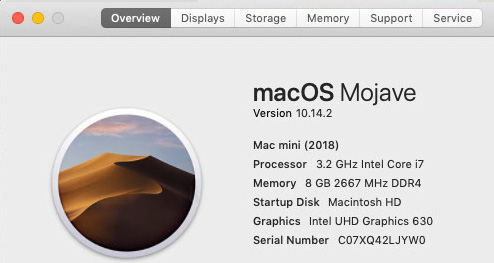
If video compression is your objective, use the computer with the most cores and the fastest CPU, ideally an i7 or better because this chip supports multi-threading. (GPU speed and RAM are less important for compression.)
For this article, I’m using a brand-new 2018 Mac mini, as you can see from the screen shot above. Not shown is that it also has a 512GB SSD.
SET UP THE MAC MINI
In this example, we’ll use a Mac mini as our compression engine. You can use any Mac, for that matter, the setup is the same. In this article, I’m simply playing with my latest toy.
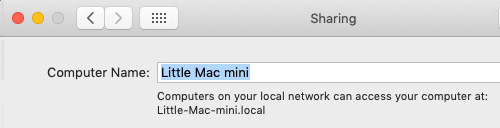
To get started, open System Preferences > Sharing and make sure the Mac mini has a computer name that will make sense to other users. Here, I’ve given it the name “Little Mac mini”. Most often, this name will be the name of the User the Mac is logged into.
NOTE: You don’t need to change any of the checkboxes lower in this screen.
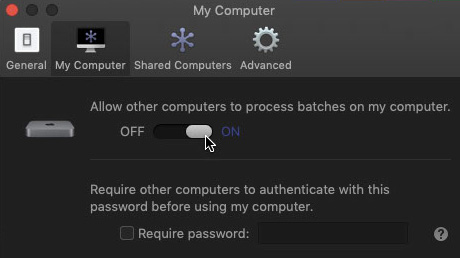
Open Compressor on the Mac mini. Go to Compressor > Preferences > My Computer and turn on “Allow other computers to process…” If you need to restrict access, add a password. Since most of the time it’s only me doing the compressing, I leave this blank.
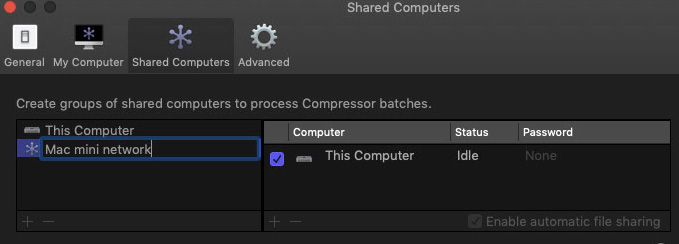
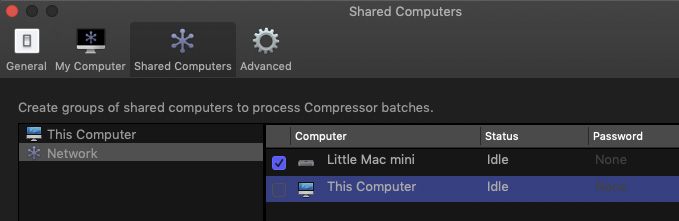
Next, go to Preferences > Shared Computers and click the Plus icon in the lower left. This adds a new “network group” to this menu.
Here, I called it “Mac mini network” – again, you can name yours anything you want.
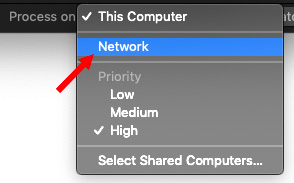
Make sure that “This Computer” is checked – it should be by default.

CRITICAL: If you are using your own file server, UNcheck “Enable automatic file sharing.” This is not obvious and it will prevent the network from working when checked.
NOTE: If you are using XSAN, leave this checked. When in doubt, read Apple’s help files.
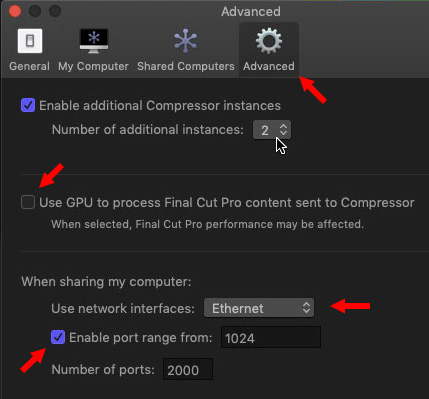
If this system will be dedicated to video compression (meaning you are not using it for other processor-intensive tasks like video editing or Photoshop) go to Preferences > Advanced and:
NOTE: You can connect a Mac mini for compression using WiFi, but your speeds will be significantly reduced; at a guess I would say by 50%, maybe a bit more.
At this point, the Mac mini is configured. Close preferences and quit Compressor. (You can leave Compressor running, but it isn’t necessary.)
NOTE: If you have multiple Macs and want to build a compression “farm,” repeat this process for each Mac mini, or other computer, you want to use.
COOL SECRET TIP
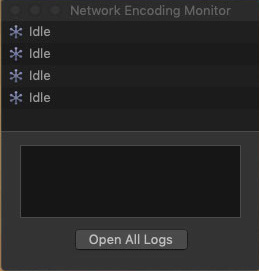
In Compressor, choose Window > Network Encoding Monitor. This will show you when a remote job is being processed by the system.
NOTE: Your number of Idle instances may be different from mine. This is not a problem. This screen is only visible when Compressor is running.
CONFIGURE THE ORIGINATING SYSTEM
We need to make the version of Compressor stored on your local system aware of the compression network we just created using the Mac mini.
Go to Preferences > Shared Computers and:
This creates a compression network which excludes your system.
NOTE: If you have multiple Mac minis, or other computers, that you want to bundle into a single master compression network, you can add them all here.
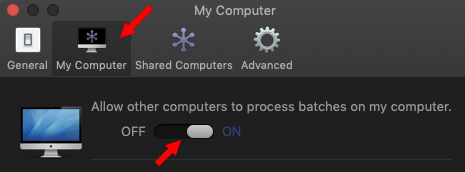
IMPORTANT: Even though you don’t want your computer to compress files, this slider MUST be set to On. (Preferences > My Computer).
Close preferences, you are now configured.
SEND A FILE TO REMOTE COMPRESSION
To send a file for compression over the network:
Make sure you are storing the file in a location on the server, NOT your local drive.
Click Start Batch.
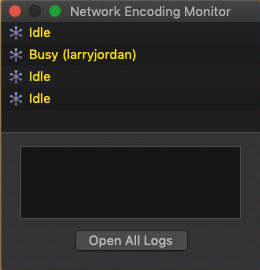
After just a few seconds, the Network Encoding Monitor lights up and shows that it is processing a job. (No, I don’t know what the different colors mean.)
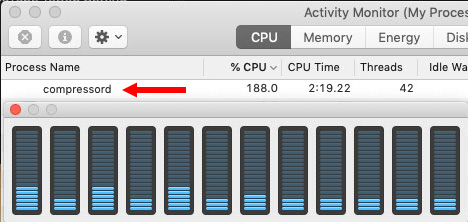
Yay! As you see here, the Mac mini applies all cores to compression. (Totals will not equal 100% due to system and application overhead.)
MISTAKES I’VE MADE
As I mentioned at the beginning, I’ve been wrestling with this network configuration thing for YEARS. As I look back on it, here are some of the bigger mistakes I’ve made:
Yeah. I spent a long time screwing this up.
SUMMARY

It is important to remember:
In spite of this requirements, if you have a server, the new Mac mini is so fast – especially for the price – that if you have older gear, this can make media compression a whole lot faster.
EXTRA CREDIT
Here is a speed comparison between a 2017 iMac and the Mac mini. I would expect results using network compression to be similar, depending upon the speed of your network.